This post is a bit of an adventure in building a very small piece of a rather cool demo.
It is really an adventure in developing thorough unit tests.
Some of you have probably noticed that my blog has been kind of dead for a pretty long stretch. Needless to say, I have been busy.
This week is HP Discover in London. It is a really big show for HP.
There is a demo called Collaboration Cubed. And I must say, it is pretty cool.
https://twitter.com/JordanTechPro/status/671698781965021188
This is all about building an experience more than it is about building software.
There is this big glass cube, with two monitors, a table, three Surface tablets, and more.
You walk in with a phone, you are recognized.
You are welcomed by a synthetic voice.
The room is tagged as occupied.
Your cohorts come into the room.
A Lync meeting begins on the wall monitor.
A tweet is sent out.
You sit down at the table and your tablets are 'called' through Lync.
You collaborate and save stuff.
You exit the cube, the Lync meeting is exited and a follow-up email is sent.
Aruba handles the device detection.
Octoblu handles the automation of the actions.
Microsoft provides OneDrive and Lync.
Why describe all of this? Well, for one thing I am kind of excepted about it. But at the same time, there are lots of moving parts. And each moving part must play its role.
I had a simple request around the tweet. Since not everyone provides their twitter handle, can we substitute their first name instead?
Sure, sounds easy enough.
I observed some of the data I had captured.
I thought I was being rather cleaver with my solution and keyed off whether or not there was an '@' in the twittername field.
I tested it, it was great.
I deployed it.
Poo, a new case arose. The app sending me data is suddenly sending me a twittername that is no more than '@'. Now I am sending tweets with @ @ @ in them (and hoping that the Twitter spam bots don't kick in and suspend the account).
Suddenly I find myself focusing on my unit tests and the variations that I have seen as well as dreaming up ones that I have not seen but expect to.
In the end to handle this simple request I had 9 conditions to cover the cases of the expected data from the other application.
The golden case where everything is good, and eight cases of other stuff.
Since I use PowerShell to do everything, my JSON looks like this:
$TwitterHandles += @{ “firstname”=”Brian”; "twittername"="@testhandle" }
$TwitterHandles += @{ “firstname”=”Brian”; "twittername"="@" }
$TwitterHandles += @{ “firstname”=”Moheeb”; "twittername"="" }
$TwitterHandles += @{ “firstname”=””; "twittername"="@" }
$TwitterHandles += @{ “firstname”=”Thomas” }
$TwitterHandles += @{ “firstname”=”Joe”; "twittername"=$null }
$TwitterHandles += @{ “firstname”=$null; "twittername"=$null }
$TwitterHandles += @{ “firstname”=”Joe”; "twittername"="null" }
$TwitterHandles += @{ “firstname”="null"; "twittername"="null" }
I had two data fields to cover issues with; twittername always being my first key and the possibility of substituting the firstname.
Now, the resulting code I wrote in JavaScript. And there is the possibility for 'null' and null. This is null as a string vs. null as an object / value. These go right along with missing or blank values.
Suddenly I have something with much better coverage of the possible cases and thus a much better product.
One hour to get the first version and three to work out all the error handling cases.
the end result is a solid product. But the lesson is to not focus on getting it done, it is to make it solid.
In case anyone want sot see the javascript, here is it;
// Requirement: If there isn't a twitter handle provided, replace with the first name
if(typeof (msg.params.twittername) !== "undefined" && (msg.params.twittername) !== null) {
if ( (msg.params.twittername).substring(0,1) === "@" && (msg.params.twittername).substring(1) && (msg.params.twittername) !== "null" ){
return msg;
} else {
if ( (msg.params.firstname).substring(0) && (msg.params.firstname) !== "null" ) {
return {
params:{
twittername: msg.params.firstname
}
};
}
}
} else {
if(typeof (msg.params.firstname) !== "undefined" && (msg.params.firstname) !== null && (msg.params.firstname) !== "null") {
return {
params:{
twittername: msg.params.firstname
}
};
}
}
Tuesday, December 1, 2015
Thursday, September 24, 2015
PowerShell to manipulate Skype for Business and Lync converations
A recent project left me playing with the Lync SDK (Skype for Business).
The Skype for Business skin was clad onto the Lync 2013 client. And thus the Lync 2013 SDK is the one I worked with.
Much of the SDK documentation is centered around writing your own application integration with Lync, event listeners, triggers, etc. I am just wanting to drive Lync, not write a replacement for it.
Yes, I do know that Office 2016 released (yesterday) but I am not going there just yet.
Lets do some interesting things with Lync:
First - if you want to get started with Lync and PowerShell there are a few blog posts. I find the automating Lync with PowerShell tutorial from Trevor Sullivan to be the most comprehensive / useful. I am not going to re-hash what Trevor has already done pretty well.
He walks you though downloading the SDK, installing it, and invoking the 'model' DLL that you need to perform all of the actions.
If you are not a developer, then you still need to install the SDK, for one particular MSI - the redistributable.
In the install folder of the SDK ( C:\Program Files\Microsoft Office\Office15\LyncSDK\Redist ) is the lyncRuntime.msi. This will give you only the bare minimum DLL that you need to make this all happen. This would be the thing you package into your application.
Now, allow me to build upon Trevor's foundation.
I am going to launch a 'conversation', then call someone, then start open 'application sharing', then end the conversation.
The big assumption here is that you are logged in to Lync. I am not going to test for that, MSFT has examples.
# import the Microsoft.Lync.Model.dll
Add-Type -Path 'C:\Program Files\Microsoft Office\Office15\LyncSDK\Assemblies\Desktop\Microsoft.Lync.Model.dll'
# Get the Lync Client SDK automation object
$Automation = [Microsoft.Lync.Model.LyncClient]::GetAutomation()
At this point in time I could go two directions. I could use the 'Meet Now' feature, or I could build a conversation object the hard way.
What I have learned through experimentation is that the Meet Now sets up quite a few things for you and is thus pretty useful. I have gone about it the other way and run into sharing problems that I don't run into when using Meet Now. So I will take advantage of the fact that they have provided this.
# Launch a 'Meet Now' conversation
$meetNow = $Automation.BeginMeetNow({}, 0)
# Get the conversation window to manipulate the conversation.
$conversationWindow = $Automation.EndMeetNow( $meetNow )
# Get the conversation
$conversation = $conversationWindow.Conversation
The first thing that I noticed is that I have something that looks no more than an 'InstantMessage' modality conversation. That is developer speak for I started a conversation and began a session of the type called instant message.
My experimentation shows that you always have IM in the background, it appears to be the base of the conversation.
Now, I want to create an empty 'Stage' just illustrate the rest.
So I will add the Application Sharing modality.
$Conversation.Modalities['ApplicationSharing'].BeginConnect({}, 0)
The Conversation Window object, there are a few things you can do to it.
Such as, make it full screen.
$conversationWindow.ShowFullScreen('0')
Now, I want to call someone. And to do that, I add a participant.
To add a participant I do need one piece of information, their SIP URL. For most organizations this is the email address of the individual, but it does not have to be (that is the caveat).
# add a person only knowing the SIP address (they do not need to be in your contacts list)
$conversation.AddParticipant( $LyncClient.ContactManager.GetContactByUri( "bogusUser@itproctology.com" ) )
# they will receive a Lync Call
You can keep adding folks. If you forgot who you added, you can look:
$conversation.SelfParticipant # this is you
$conversation.Participants # this is everyone
Now, lets begin to close down this meeting example.
# exit full screen
$conversationWindow.ExitFullScreen() # note the application is left maximized.
# lets resize the window
$conversationWindow.Resize( 300, 300 )
# remove a participant (we only have their SIP address)
$removePeep = $conversation.Participants | where { $_.Contact.Uri -Match "bogusUser@itproctology.com" }
That was a sneaky one liner of me. Note that I took all of the participants (which is always an array BTW) and I looked for the ContactUri that contained the email of my person to kick off the meeting.
$conversation.RemoveParticipant( $removePeep )
# note, the person you remove receives a notice that they were removed from the conversation.
# End the meeting
$conversation.End()
That is it. The lifecycle of a Lync meeting from PowerShell
Those objects are powerful.
Say that you already have a meeting running and you want to use PowerShell to find it;
For this we need the Conversation Manager.
$LyncClient = [Microsoft.Lync.Model.LyncClient]::GetClient()
$conversation = $LyncClient.ConversationManager.Conversations
And then find the conversation (as we can have more than one IM conversation at a time).
Now, a few other shortcuts to get you working:
# add IM into IM Window
$Conversation.Modalities['InstantMessage'].BeginSendMessage("Welcome", {}, 0)
# what I can share
$resources = $Conversation.Modalities['ApplicationSharing'].ShareableResources
# share my desktop
$Conversation.Modalities['ApplicationSharing'].BeginShareDesktop( {}, 0)
# share a specific resource
$Conversation.Modalities['ApplicationSharing'].BeginShareResources( $resources[1], {}, 0)
# add voice
$Conversation.Modalities['AudioVideo'].BeginConnect({}, 0)
# remove contect sharing (stop sharing, stage stays present)
$Conversation.Modalities['ApplicationSharing'].BeginDisconnect([Microsoft.Lync.Model.Conversation.ModalityDisconnectReason]::None, {}, 0)
# stop the video call, keep the IM
$conversation.Modalities['AudioVideo'].BeginDisconnect([Microsoft.Lync.Model.Conversation.ModalityDisconnectReason]::None, {}, 0)
# send a thanks for attending IM
$Conversation.Modalities['InstantMessage'].BeginSendMessage("Thanks for attending. Tasks will follow.", {}, 0)
Thursday, August 20, 2015
Enabling Hyper-V causes continuous reboot
[updated 9/24/2015]
This is a post that I am getting out to pull together a symptom that I am seeing in the TechNet forums and is spread across multiple threads.
I will be updating this thread as I follow things unfolding. If you have this issue, please follow this post or the thread I mention below.
The current take aways:
A bit of background; Hyper-V takes advantage of hardware virtualization features.
As new releases come out it is not unusual for the platform to take advantage of some hardware feature that is not properly or fully implemented in hardware. This has played in historic releases.
Now, I am not being critical by pointing that out. What is am saying is this:
Step 1: check for BIOS updates from your system / motherboard manufacturer and update the BIOS.
As revealed in this thread: Windows 10 x64 Pro infinite reboot loop with Hyper-V enabled this pattern has played out again.
That said, iommu has (actually) been around for a long time. And, most likely has not been taken advantage of, so I can understand the recommendation of disabling it in the bootloader.
That said, when do you set it? Before or after enabling Hyper-V?
Did you update your BIOS?
As MSFT reports this issue to manufacturers, the BIOS update will become more relevant.
If you want to understand how important this is, search the Hyper-V forum for "Sony Viao" - Sony chose to release a system that reported chipset virtualization as being enabled, when in fact it was not.
Step 2: Check your network card drivers.
This one was a surprise. Now, the networking stack has been undergoing an overhaul over time. And in this release there are some big changes under the hood (that are pretty much hidden).
That said, recent reports are that rolling back to older versions of Network drivers can al alleviate this issue.
Here is the report from one recent poster in TechNet:
thanks for sharing your experience with Hyper-V on Windows 10 and the Broadcom wireless driver because it looks like you helped find a solution I could use in the meantime that does not crash/BSOD the Dell Precision M3800 laptop.
I used "Update Driver">"Browse My Computer">"Let me pick from a list of device drivers on my computer" to list the drivers on my machine and I happened to have a 6.x version of the driver already on my machine.
Specifically I changed drivers from/to:
-- Before -- "Dell Wireless 1560 802.11ac Version: 7.35.295.0 [7/30/2015]"
-- After -- "Dell Wireless 1560 802.11ac Version: 6.30.223.259 [11/28/2014]"
After picking the 6.x driver I reinstalled the Hyper-V role, created a Virtual Switch(had to do it twice) and added it to the imported VM. I've been working with it all day and haven't had a BSOD/crash yet.
This is interesting, as most likely, you got new drivers through the upgrade process. And MSFT most likely got them from Dell, or Broadcom, or Intel.
This said, Broadcom drivers do have a long and sordid history with Hyper-V and I generally stick with the in-box delivered drivers as those are usually the ones tested. But this entire upgrade process is new, and if the virtual switch existed prior to the upgrade it would have one set of capabilities (copied form the physical NIC) and the new driver would give a different set of capabilities. There is obviously some incompatibility here.
This is a post that I am getting out to pull together a symptom that I am seeing in the TechNet forums and is spread across multiple threads.
I will be updating this thread as I follow things unfolding. If you have this issue, please follow this post or the thread I mention below.
The current take aways:
- BIOS / chipset
- NIC / drivers
A bit of background; Hyper-V takes advantage of hardware virtualization features.
As new releases come out it is not unusual for the platform to take advantage of some hardware feature that is not properly or fully implemented in hardware. This has played in historic releases.
Now, I am not being critical by pointing that out. What is am saying is this:
Step 1: check for BIOS updates from your system / motherboard manufacturer and update the BIOS.
As revealed in this thread: Windows 10 x64 Pro infinite reboot loop with Hyper-V enabled this pattern has played out again.
This thread has been deleted for some reason. Unknown as to why or by whom.
There is a new hardware feature that has been implemented with Windows 10: IOMMU
According to Wikipedia, iommu is a memory management feature that is present in both Northbridge and Southbridge Intel processors.
Quite honestly, I see folks with i7's reporting this problem.
That said, I have long mentioned that manufacturers release processors in families. And within a family a feature may exist, but not across all processors in the family. So you must always check your particular chipset with the manufacturer to ensure that your chipset actually implemented the feature that you think you have.
Manufacturers do this so that they can offer a range of prices for end products. Be mindful of that.
I bring that up because I cannot tell you hoe many times I have helped folks wit an issue that turned out to be related to them thinking they have a feature (the motherboard implemented it) but the chipset actually lacked it (the particular processor they had didn't implement it, but the processor family did).
Now, here is the latest advice from MSFT folks:
There is a known issue where the machine will fail to boot when Hyper-V is installed but DEP/NX/XD is disabled in BIOS. You mentioned that you have enabled these options, but you are continuing to see the same problem.
One other thing we can try is disabling the IOMMU policy and see if that helps. (The hypervisor's usage of the IOMMU device by default is new in Windows 10, and might explain why you are seeing this only on Windows 10).
You can disable IOMMU usage by the hypervisor by running the following command from an elevated cmd window & rebooting your machine:
bcdedit /set {default} hypervisoriommupolicy disable
Can you try this and let me know if it helps?
If you can also share msinfo32 information with us, that will be helpful with the investigation.
- One poster reported resolution when they simply disabled Data Execution Prevention and enabled it again (this requires a cold boot).
That said, iommu has (actually) been around for a long time. And, most likely has not been taken advantage of, so I can understand the recommendation of disabling it in the bootloader.
That said, when do you set it? Before or after enabling Hyper-V?
Did you update your BIOS?
As MSFT reports this issue to manufacturers, the BIOS update will become more relevant.
If you want to understand how important this is, search the Hyper-V forum for "Sony Viao" - Sony chose to release a system that reported chipset virtualization as being enabled, when in fact it was not.
Step 2: Check your network card drivers.
This one was a surprise. Now, the networking stack has been undergoing an overhaul over time. And in this release there are some big changes under the hood (that are pretty much hidden).
That said, recent reports are that rolling back to older versions of Network drivers can al alleviate this issue.
Here is the report from one recent poster in TechNet:
thanks for sharing your experience with Hyper-V on Windows 10 and the Broadcom wireless driver because it looks like you helped find a solution I could use in the meantime that does not crash/BSOD the Dell Precision M3800 laptop.
I used "Update Driver">"Browse My Computer">"Let me pick from a list of device drivers on my computer" to list the drivers on my machine and I happened to have a 6.x version of the driver already on my machine.
Specifically I changed drivers from/to:
-- Before -- "Dell Wireless 1560 802.11ac Version: 7.35.295.0 [7/30/2015]"
-- After -- "Dell Wireless 1560 802.11ac Version: 6.30.223.259 [11/28/2014]"
After picking the 6.x driver I reinstalled the Hyper-V role, created a Virtual Switch(had to do it twice) and added it to the imported VM. I've been working with it all day and haven't had a BSOD/crash yet.
This is interesting, as most likely, you got new drivers through the upgrade process. And MSFT most likely got them from Dell, or Broadcom, or Intel.
This said, Broadcom drivers do have a long and sordid history with Hyper-V and I generally stick with the in-box delivered drivers as those are usually the ones tested. But this entire upgrade process is new, and if the virtual switch existed prior to the upgrade it would have one set of capabilities (copied form the physical NIC) and the new driver would give a different set of capabilities. There is obviously some incompatibility here.
Wednesday, July 22, 2015
Docker Containers to Images
I am still learning containers and what Docker gives to aide in managing containers.
It seems that each time that I re-visit doing things with containers that I discover something new and curiously wonderful.
I totally understand why folks get container excited, and why developers love them so much, and why operations folks should totally love Hyper-V containers, and, and... There I go getting excited.
If you have read my previous posts of containers I tired to relay some conceptual ideas of what a 'container' actually is. It is not a process, it is not a VM, it is not a session. It is a little bit of all of them which is what makes describing a container not a straight forward thing.
And, you will recall that a container is the running state of an image. And an image is a flat file structure that represents the application and everything it needs to run.
A container is more than a running service copy of an image. It is that image, plus all the settings you gave it when you told Docker to run - create container 'foo' from image 'bar' with all of these settings.
The Docker tutorials really don't cover this well. They just toss you out there and say, pull this image, run a container from this image, look - you did it. Conceptually, there is a lot happening that Docker abstracts away, saves for you, manages for you (which is why folks have caught onto Docker).
All of those settings that you give are meta information that define that container.
After you run that container (with all of those settings defined) you can simply stop it. Then when you start it later, all of those run parameters that you defined are magically applied out of the configuration - you never have to define all of those parameters again.
If you then stop your container and then commit that container to a new image, all of that meta information is saved.
If you inspect a container or an image you can see all of this meta information that defines what happens when that container is started or that image is run.
Then, if you share this image and someone else runs it, they get all of your defined configuration applied.
Let me put all of this together with a simple walkthrough.
First: run a container.
sudo docker run -it ubuntu:latest /bin/bash
Breaking that command back apart:
run an instance of a container (with a random name and id), interactively, using the Ubuntu image (from the Docker Hub) of the latest version, then run the bash shell application.
The prompt that you get back is root@
Second: stop that container
sudo docker stop
While that container ran, anything you did was persisted within its file system.
Third: list all containers
sudo docker ps -a
The Container is the runtime process. To see ones that are not running you add the all switch.
Fourth: start that container
sudo docker start
notice that the image and command to run did not have to be defined. But I did not define how to connect to the process. That is what -it does. So it is now running in the background. Stop it again and add -it before the container id and you are back in.
Then stop it again before the next step.
If you wanted to see that your commands were in there, just inspect the container.
sudo docker inspect
Fifth: commit that container to an image
sudo docker commit name:version
Now, you can create duplicates of your container by running container instances of your image.
And, you an use inspect against the images as well.
And there you have it.
In the next container post, I am going to use a real world application in a container and discuss configurations and variables.
It seems that each time that I re-visit doing things with containers that I discover something new and curiously wonderful.
I totally understand why folks get container excited, and why developers love them so much, and why operations folks should totally love Hyper-V containers, and, and... There I go getting excited.
If you have read my previous posts of containers I tired to relay some conceptual ideas of what a 'container' actually is. It is not a process, it is not a VM, it is not a session. It is a little bit of all of them which is what makes describing a container not a straight forward thing.
And, you will recall that a container is the running state of an image. And an image is a flat file structure that represents the application and everything it needs to run.
A container is more than a running service copy of an image. It is that image, plus all the settings you gave it when you told Docker to run - create container 'foo' from image 'bar' with all of these settings.
The Docker tutorials really don't cover this well. They just toss you out there and say, pull this image, run a container from this image, look - you did it. Conceptually, there is a lot happening that Docker abstracts away, saves for you, manages for you (which is why folks have caught onto Docker).
All of those settings that you give are meta information that define that container.
After you run that container (with all of those settings defined) you can simply stop it. Then when you start it later, all of those run parameters that you defined are magically applied out of the configuration - you never have to define all of those parameters again.
If you then stop your container and then commit that container to a new image, all of that meta information is saved.
If you inspect a container or an image you can see all of this meta information that defines what happens when that container is started or that image is run.
Then, if you share this image and someone else runs it, they get all of your defined configuration applied.
Let me put all of this together with a simple walkthrough.
First: run a container.
sudo docker run -it ubuntu:latest /bin/bash
Breaking that command back apart:
run an instance of a container (with a random name and id), interactively, using the Ubuntu image (from the Docker Hub) of the latest version, then run the bash shell application.
The prompt that you get back is root@
Second: stop that container
sudo docker stop
While that container ran, anything you did was persisted within its file system.
Third: list all containers
sudo docker ps -a
The Container is the runtime process. To see ones that are not running you add the all switch.
Fourth: start that container
sudo docker start
notice that the image and command to run did not have to be defined. But I did not define how to connect to the process. That is what -it does. So it is now running in the background. Stop it again and add -it before the container id and you are back in.
Then stop it again before the next step.
If you wanted to see that your commands were in there, just inspect the container.
sudo docker inspect
Fifth: commit that container to an image
sudo docker commit
Now, you can create duplicates of your container by running container instances of your image.
And, you an use inspect against the images as well.
And there you have it.
In the next container post, I am going to use a real world application in a container and discuss configurations and variables.
Tuesday, July 21, 2015
Disabling that XfinityWifi home hot spot wireless interference
I got into a wireless networking troubleshooting a few years back as a Field Technical Advisor for First Technology Challenge with the FIRST organization.
The system that they had at the time (recently replaced) was based on 802.11b using a relatively low powered device on the robot that was named Samantha. John Toebes was the brain behind Samantha, and at the time she was a revolutionary step over using Bluetooth to control the FTC robots.
Being 802.11b based, she would work with most any 2.4ghz router on the market (in theory, and there are interesting reasons why she didn't work with them all). The other thing about 802.11b is that it was early in the standards for wireless, before it got really popular and the ways to deal with interference got much smarter.
As the spectrum becomes more crowded, signals are pushed out. If someone is streaming something (like video) that signal actually gets precedence in the local airwaves. In other words, activity in the local airspace interferes with other activity in the local airspace.
Why am I digressing so far from the title of the post? I recently read through an article by Xfinity: "10 ways you could be killing your home Wi-Fi signal"
It has a number of harmless suggestions, such as: Get your router off the floor, put it on the floor where there is the most use, don't put it in windows or behind your TV, etc.
All of the suggestions are about maintaining line of sight with your router. Frankly, advice that we gave long before home Wi-Fi routers got to the great performance levels that they are at today.
Not once do they mention interference with other wireless signals. Maybe because they (xfinity) create one of the biggest problems with their own xfinitywifi open access point.
I have had all kinds of trouble with xfinity wireless throughput since they started this open wifi program. I have changed routers, purchased my own cable modems, moved up to low end professional equipment, replaced the splitters on the cable, used di-electric grease on the outside cable junctions, etc.
I got the performance to the point where when I was wired, I got the full throughput that we paid for. But as soon as I went wireless I got 1/4 of the throughput. It made no sense. Especially since we used to have far better throughput on wireless.
Since I run my own router, I don't use the open wifi connection that Xfinity forces on to you. Needless to say, I just don't trust them.
Believe it or not, they let you self service turn that off. So you can be sure that your neighbors are not sponging off the bandwidth that you pay good money for (they can be beholden to the great Comcast too if they really want broadband).
Anyway, thanks for reading all this. But I know what you really wan is this link: http://customer.xfinity.com/help-and-support/internet/disable-xfinity-wifi-home-hotspot
And just in case they move it or something else, I am going to copy it as well:
- Navigate to https://customer.xfinity.com/WifiHotspot. This site can also be reached by following these steps:
- Navigate to the My Services section of My Account.
- Under the XFINITY Internet tab, click the Manage your home hotspot link.
- A new window appears indicating, "If you choose to enable your XFINITY WiFi Hotspot feature, a separate network called ‘xfinity wifi’ will be created for your guests - at no additional charge. Never give out your home network password again, so your private WiFi network will always remain secure. Learn more".
- Under the Manage XFINITY WiFi Home Hotspot option, if your wireless gateway is enabled with the Home Hotspot feature, the Enable my XFINITY WiFi Home Hotspot feature radio button will be pre-selected. If your Home Hotspot feature is disabled, the Disable my XFINITY WiFi Home Hotspot feature radio button will be pre-selected.
- To enable or disable the feature, choose the Enable my XFINITY WiFi Home Hotspot feature radio button or the Disable my XFINITY WiFi Home Hotspot feature radio button.
- Click Save.
- Disabling the feature takes effect within a few minutes.
- However, enabling the device will take up to 24 hours.
- You will be presented with a confirmation message at the top of the My Services page that says, "Thank you! Your hotspot has now been disabled."
Monday, July 13, 2015
Identifying and running workflows with the Octoblu API and PowerShell
If you are not familiar with Octoblu; it is an IoT messaging system, a protocol translation system, and a message transformer for IoT all rolled into one product.
Since last year I have been spending quite a bit of my time with their systems and platform.
Everything in their system is a device, your user account, a software agent that we demonstrated on the Synergy 2015 stage day 2 keynote, each node that you see in the designer, even that running workflow. They are all devices and they all have messages bouncing around between them.
One thing that I have come to rely on are their workflows. I use the flows as a message router / message translator.
By that I mean that I formulate a JSON message and send that to some endpoint (I frequently send a REST message to a trigger using PowerShell). And the flow will do something with that message - it might change it, filter it, route it to one or many other devices (seen in the flow designer as 'nodes').
All that said, I will probably post about sending and transposing messages later. It is actually one of the fundamental things that any device does in the IoT world.
I am pretty loose with the concept of what a 'device' is: it can be the Arduino that I have on my desk that runs Microblu, it can be a Node.js application that I run on my workstation, it can be a personal interface to Github (the Github node in Octoblu). A device is anything that can either send or receive a message.
Back to the title of this post.
I just finished running a long duration test against a 'device' and during this test I wanted to ensure that my workflow remained running.
When you begin to rely on workflows you realize that it is a cloud service and things happen. Sometimes flows get knocked offline.
Over time I have dreamed up a couple approaches to evaluating flows from a 'health' perspective. One of them (my v1) I am using as my base for this post.
This is a really simple approach; make an API call that determines if s flow is running.
If it isn't running, I start it. Simple as that.
The complexity comes with two different APIs being involved; as there are two different systems of the service at play.
There is the Octoblu API - this is the Octoblu designer and the GUI and those pretty things that you visually interact with.
And there is the Meshblu API - this guy is the messaging meat of the infrastructure. He handles routing, security, and devices. When a flow is run for the first time it becomes instantiated over on Meshblu and becomes a device of the ecosystem.
The code is in my Github Octoblu PowerShell repo here: https://github.com/brianehlert/OctoPosh
The particular script behind this post is: "FlowWatcher.ps1"
Though I have comments in my script allow me to describe a bit more of what is happening.
Invoke-RestMethod -URI ("http://meshblu.octoblu.com/devices/" + $flowId) -Headers $meAuthHeader -Method Get
This is a Meshblu API call to fetch the properties of an individual device. Note the $flowId GUID string in the URI path. Leave that GUID out and you get back an array of all of the devices that you 'own'.
Invoke-RestMethod -URI ("https://app.octoblu.com/api/flows/" + $flowId) -Headers $meAuthHeader -Method Get
This is an Octoblu API call to fetch an individual flow / workflow. Just as happens if you open one in the designer, you get all of its properties.
Invoke-RestMethod -URI ("https://app.octoblu.com/api/flows/" + $flowId + "/instance") -Headers $meAuthHeader -Method Post
This is another Octoblu API call to start a flow. What happens is that a flow device instance gets instantiated in Meshblu (this way it can receive messages). This is why I call the Meshblu API to see if it is 'running'.
Invoke-RestMethod -URI ("https://app.octoblu.com/api/flows/" + $flowId + "/instance") -Headers $meAuthHeader -Method Delete
This is a Meshblu API call to stop flow. What it does is delete the running instance of the device. If you query this particular device in Meshblu (after you have run it once) you will find it in Meshblu, but it may not be running. If it is running, it is a little process within the infrastructure, when not running it is still defined as a device.
I hope you find the script and this little API tutorial to be useful.
Thursday, July 9, 2015
Indexing Format-Table output
Today, I had the crazy idea of outputting an array in PowerShell as a table, and I wanted to show the index of each array value.
In laymen's terms: I wanted my table output to be line numbered. And I wanted to line numbers to correspond to the position in the array.
Why? because I didn't want the user to type in a name string or a GUID string that they might typo, they could simply enter the index of the item(s).
Trying to solve potential problems upfront, without a bunch of error handling code.
I started out with a PowerShell array that looked something like this:
PS\> $allFlows | ft name, flowid -AutoSize
name flowId
---- ------
bjeDemoFlow_working 70bd3881-8224-11e4-8019-f97967ce66a8
bje_cmdblu 3e155fe0-dc9a-11e4-9dfc-f7587e2f6b74
Pulser_WorkerFlow_Sample f945f94f-fb33-4181-864d-042548497270
Flow d59ae1e8 d59ae1e8-0220-4fd2-b40f-fba971c9cf42
bjeConnectTheDots.io 204b5897-2182-4aef-84fe-1251f1d4943b
StageFlow_1 796d0ff4-94d6-4d1a-b580-f83ab98c7e15
Flow f26aab2f f26aab2f-783b-4c09-b1fc-9e6433e8ab37
Flow c983c204 c983c204-5a87-4947-9bd2-435ac727908a
v2VDA Test ba5f77af-98d1-4651-8c35-c502a72ccea8
Demo_WorkerFlow e7efdac4-663d-4fb6-9b29-3a13aac5fb97
Now for the strange part. How do I number the lines in a way that they correspond to each items position in the array?
Search did not fail me today, but it took a bit of effort to discover an answer in StackOverflow from PowerShell MVP Keith Hill.
And, also looking at Get-Help Format-Table -Examples and realizing that there is an 'expression' option to calculate the value of a field in the table output.
PS\> $allFlows | ft @{Label="number"; Expression={ [array]::IndexOf($allFlows, $_) }}, name, flowid -AutoSize
number name flowId
------ ---- ------
0 bjeDemoFlow_working 70bd3881-8224-11e4-8019-f97967ce66a8
1 bje_cmdblu 3e155fe0-dc9a-11e4-9dfc-f7587e2f6b74
2 Pulser_WorkerFlow_Sample f945f94f-fb33-4181-864d-042548497270
3 Flow d59ae1e8 d59ae1e8-0220-4fd2-b40f-fba971c9cf42
4 bjeConnectTheDots.io 204b5897-2182-4aef-84fe-1251f1d4943b
5 StageFlow_1 796d0ff4-94d6-4d1a-b580-f83ab98c7e15
6 Flow f26aab2f f26aab2f-783b-4c09-b1fc-9e6433e8ab37
7 Flow c983c204 c983c204-5a87-4947-9bd2-435ac727908a
8 v2VDA Test ba5f77af-98d1-4651-8c35-c502a72ccea8
9 Demo_WorkerFlow e7efdac4-663d-4fb6-9b29-3a13aac5fb97
The values for the column are defined as a hashtable @{}
With the Label of the column and the Expression that defines the value.
Pretty nifty new trick to add to my repertoire.
Wednesday, July 1, 2015
A tale of containers
Containers. It is a word that we keep hearing about lately.
And in the popular vernacular a container refers to a "docker style container".
You say: "But Docker doesn't do containers" And, you are right.
These containers are what was originally known as (and still are) LXC containers and everyone associates with Docker .
Docker is not the container technology, Docker is container management and a container ecosystem. They only made containers easy.
Now, in the virtualization world folks have used this container word for a long time. It has been used to describe the isolation models themselves.
I really wish we had a better word for this type of container, other than 'container'.
With the modern Windows OS we have:
Now, 'container' containers.
A container is a bounded process that can contain processes.
A container is a file system boundary.
And, a container has its own networking stack.
A container shares the kernel and other processes with the machine on which it runs.
The processes in one container cannot see the process in another container.
Container processes interact with each other through the networking stack, just like applications on different machines are required to.
But, to be technical with the language; only the running process is a 'container'. When it is not running it is a container image.
And a container image is similar to an OS image. It has kernel, bootloader, files, and applications.
Now lets complex-ify all of this.
Linux currently has one type of container, LXC.
Windows is actually introducing two types of containers.
Images are another interesting aspect of containers.
If you have played with installing an application with Docker (such as creating a Docker build file) you begin with a base OS (preferably from a trusted source such as Canonical for Ubuntu). Then you layer on OS settings, and application downloads and installations.
In the end, you have this image. And this image is made up of chained folders, similar to the idea of checkpoints (VM snapshots or differencing disks).
However, in the container world, it is files and a file system. No virtual block devices as is said in virtualization circles. A virtual block device is a representation of a hard drive block layout. It is literally raw blocks, just like a hard drive.
Now, does this mean that since Canonical produces a 'docker' image for Ubuntu, that Microsoft will produce a 'docker' image for Windows Server? Most likely in some form.
Nano Server would make a neat base container image, Server Core as well.
Shell based applications would be a bit hairier. And a considerably larger base image since you have all of that Windows Shell in there.
But remember, a container image is a file base system. Now, just think about maintaining that image. The potential of swapping out one of the layers of the image to add an OS patch, or an application update. Not having to destroy, update, and deploy.
Oh, so exciting!
And in the popular vernacular a container refers to a "docker style container".
You say: "But Docker doesn't do containers" And, you are right.
These containers are what was originally known as (and still are) LXC containers and everyone associates with Docker .
Docker is not the container technology, Docker is container management and a container ecosystem. They only made containers easy.
Now, in the virtualization world folks have used this container word for a long time. It has been used to describe the isolation models themselves.
I really wish we had a better word for this type of container, other than 'container'.
With the modern Windows OS we have:
- Process containers: this is a process, it runs in its own memory space, it inherits a security context from either a user or the system, and it shares all aspects of the OS resources. If it has a TCP listener, it must be unique so it does not conflict with others, it has to use RAM nicely or it overruns other processes, and so on.
- Session containers: This is a user session. Enabled by the multi-user kernel. A session is a user security context container and within it are processes. The user is the security boundary.
- machine containers: This is a virtual machine. It can be likened to a bare metal installation. It is very heavy weight in that it is an entire installation. Within it run session containers and process containers. It is a very hard security boundary. It has a networking stack, it does not share resources (file system, RAM, CPU) but it can consume shared resources when running on a hypervisor.
Now, 'container' containers.
A container is a bounded process that can contain processes.
A container is a file system boundary.
And, a container has its own networking stack.
A container shares the kernel and other processes with the machine on which it runs.
The processes in one container cannot see the process in another container.
Container processes interact with each other through the networking stack, just like applications on different machines are required to.
But, to be technical with the language; only the running process is a 'container'. When it is not running it is a container image.
And a container image is similar to an OS image. It has kernel, bootloader, files, and applications.
Now lets complex-ify all of this.
Linux currently has one type of container, LXC.
Windows is actually introducing two types of containers.
- Windows containers - this type of container runs like a process on your workstation. It consumes your available RAM and CPU and a folder full of files. It smells like any application process, except; it has a network stack, and it cannot directly interact with other processes, it can only see its folder on the file system. It is a process in a can. Hence, container.
- Hyper-V containers - this type of container is just like the one above but with a more solid isolation boundary. It gets the benefit of hypervisor CPU and RAM management (fair share), it is forced to play well as a process. And, its meets isolation compliance standards just like a VM does. No shared OS, the image contains the kernel.
Images are another interesting aspect of containers.
If you have played with installing an application with Docker (such as creating a Docker build file) you begin with a base OS (preferably from a trusted source such as Canonical for Ubuntu). Then you layer on OS settings, and application downloads and installations.
In the end, you have this image. And this image is made up of chained folders, similar to the idea of checkpoints (VM snapshots or differencing disks).
However, in the container world, it is files and a file system. No virtual block devices as is said in virtualization circles. A virtual block device is a representation of a hard drive block layout. It is literally raw blocks, just like a hard drive.
Now, does this mean that since Canonical produces a 'docker' image for Ubuntu, that Microsoft will produce a 'docker' image for Windows Server? Most likely in some form.
Nano Server would make a neat base container image, Server Core as well.
Shell based applications would be a bit hairier. And a considerably larger base image since you have all of that Windows Shell in there.
But remember, a container image is a file base system. Now, just think about maintaining that image. The potential of swapping out one of the layers of the image to add an OS patch, or an application update. Not having to destroy, update, and deploy.
Oh, so exciting!
Tuesday, June 2, 2015
Linux VMs not getting IP with Hyper-V wireless external switches
For the past two days I have been building Ubuntu VMs on my laptop which runs Hyper-V.
I would install an Ubuntu VM, then try and update and discover that the VM has an IPv6 address but no IPv4 IP address.
So, off into the land of tweaking Ubuntu. No go.
Next, my kids report router problems. So I assume there is a correlation and I screw around with the router. No change.
I delete and re-create virtual switches. No Change.
After a bit of frustration and some calming attention to detail, I realize that the IPv6 address that my VM is getting is actually self generated, it was not getting it from my ISP (as I originally thought - since we do IPv6).
The one pattern is that; a virtual switch on the wired NIC always works with the VMs and the wireless doesn't.
The other pattern is that Windows VMs are just fine. It is only Linux.
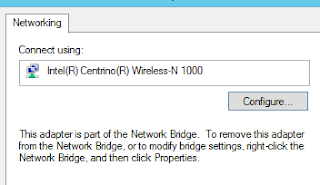
Now. Since this is an external virtual switch that includes a wireless NIC a Network Bridge device is added.


My thinking is; if Network Bridge is dependent on Wi-Fi, shouldn't it be after Wi-Fi?
(if you cluster or have clustered or have been around Windows as a server admin for a while you have probably messed with this before)

I would install an Ubuntu VM, then try and update and discover that the VM has an IPv6 address but no IPv4 IP address.
So, off into the land of tweaking Ubuntu. No go.
Next, my kids report router problems. So I assume there is a correlation and I screw around with the router. No change.
I delete and re-create virtual switches. No Change.
After a bit of frustration and some calming attention to detail, I realize that the IPv6 address that my VM is getting is actually self generated, it was not getting it from my ISP (as I originally thought - since we do IPv6).
The one pattern is that; a virtual switch on the wired NIC always works with the VMs and the wireless doesn't.
The other pattern is that Windows VMs are just fine. It is only Linux.
Now. Since this is an external virtual switch that includes a wireless NIC a Network Bridge device is added.

I decided to poke around a bit. I checked the properties of the Wi-Fi adapter (as it is common for power management to mess things up). I discover that I cannot edit the driver properties of the Wi-Fi adapter due to the Network Bridge.

If I open the properties of the Network Bridge, I can then disable Power Management on the NIC.
Come to find out tat was a waste of my time. But hey, I had to try it.
But, wait a minute. The bridge is dependent on the NIC. ... Network bindings pops into my head.
It used to be really easy to get into the bindings and totally mess things up. Needless to say, it is not so intuitive any longer.
At the Network Connections press the ALT key, this reveals the file menu - select Advanced and then Advanced Settings.
What I notice is that the binding order is: Network Bridge, Wi-Fi, Ethernet
My thinking is; if Network Bridge is dependent on Wi-Fi, shouldn't it be after Wi-Fi?
(if you cluster or have clustered or have been around Windows as a server admin for a while you have probably messed with this before)
So I decided to give it a shot and move the Network bridge after Wi-Fi.
I then reboot for the change to take effect.
I then attach a VM to the virtual switch on my wireless NIC, cross my fingers, and power it on.
The VM boots right up, no hang at networking. I logon, I type ifconfig and voila the VM has a proper network configuration. I run 'sudo apt-get update' and all is glorious and good.
Just to fun, I build a Generation1 VM and install the pfsence router into it.
That failed the auto configure test, but after reboot it came up just perfect (and it didn't prior). And the latest version has the integration Components built-in and can use synthetic virtual NICs instead of Legacy - and even reports the IP address to the networking tab in Hyper-V Manager (I love that).
So much pain and consternation, for what now feels like a binding order bug.
I will update this is anything changes, but in the mean time: It works!
Now, why might Windows VMs work just fine?
Because they keep trying to get an IP, they don't just try once at boot and then fail. So that network stack can come live at any time, in any order (and generally does late in the boot sequence).
Friday, May 1, 2015
Further automating GoToMeeting on a Windows client
To continue to build on my previous post I decided to add a bit of id10t proofing to my automation script.
The only thing that the script does not do is logon the user (I mean, who really wants to handle (secure) user credentials in the first place).
This is here for my benefit, but I am sure that this can be useful to someone else. There is nothing here that I did not discover through internet search or my own discovery.
I don't register an event monitor for a simple reason, I cannot guarantee that the execution of this program has admin rights. Admin access on the local computer is required to register for an event, though it would be nice for a user to be able to register for user mode process events.
Enjoy!
<#
.SYNOPSIS
    This will install the full G2M client for hosting meetings if it is not already installed prior to joining the meeting.
.PARAMETERS
    $g2mId - the meeting ID that will be joined. This can be any g2m ID, the user will be 'joining' an existing meeting (theirs or someone else's).
    $g2mKill - if there is a G2M already running that will be killed and the passed G2M will be joined.
.AUTHOR
    Brian Ehlert, Citrix Labs, Redmond, WA
#>
function startG2m
{Param(
[parameter(Mandatory = $false)]
[ValidateNotNullOrEmpty()]
[string]$g2mId,
[parameter(Mandatory = $false)]
[boolean]$g2mKill = $false
) # finds the path of g2mstart.exe
# each version is in its own folder so you have to find the latest / most recent version
$gtmFolder = Get-ChildItem -Path $env:LOCALAPPDATA\Citrix\GotoMeeting -ErrorAction SilentlyContinue | Sort-Object -Property Name -Descending | Select-Object -First 1 if ( !($gtmFolder) ) {
"G2M is _not_ installed. Installing the hosting client."
# Install the GTM client
Start-Process "https://global.gotomeeting.com/meeting/host" Start-Sleep -Seconds 2 # close the IE tab that was opened
$ie = (New-Object -COM "Shell.Application").Windows() | where { $_.Name -eq "Internet Explorer" } foreach ($tab in $ie) {
if ( $tab.LocationURL -match "download.citrixonline.com" ) {
do {
Start-Sleep -Seconds 1
} until ( $tab.Busy -eq $false )
$tab.Quit()
}
} # wait for the client logon prompt
Do { Start-Sleep -Seconds 2 } until ( Get-Process -Name "g2mlauncher" -ErrorAction SilentlyContinue ) startG2m -g2mId $g2mId } else {
# is there an existing G2M that needs to be killed?
# if we reconnect to the same meeting too quickly we will have ourself as an orphaned attendee.
if ($g2mKill) {
if ((Get-Process -Name "g2mui" -ErrorAction SilentlyContinue)) {
"Killing the running G2M"
Get-Process -Name "g2mui" | Stop-Process -Force
Do { Start-Sleep -Seconds 2 } until ((Get-Process -Name g2mlauncher -ErrorAction SilentlyContinue).Handles -lt 500)
} else {"The user was not joined to a G2M"}
} "G2M is installed, using the installed client"
# build the path
$g2mstartPath = $gtmFolder.FullName + "\g2mstart.exe" # Define the arguments - double quotes is important for g2mstart.exe
$g2mArgs = ("'/Action Join' '/MeetingID $g2mId'" ).Replace("'",'"') # is there a G2M video conference running? We will collide if there is.
if (!(Get-Process -Name "g2*conference")) {
if ( $g2mId ){
"Joining the meeting"
Start-Process -FilePath $g2mstartPath -ArgumentList $g2mArgs
} else { "No G2M ID was provided" }
} else { "A G2M is already running" }
}
}
#Example
startG2m -g2mId 000000000 -g2mKill $true
Start-Sleep -Seconds 5 # wait for the conference to initialize
$process = Get-Process -Name "g2*conference"
Wait-Process -InputObject $process # wait for the person to end the conference
# Do something else
"boo!"
Tuesday, April 28, 2015
PowerShell launching GoToMeeting on Windows
It isn't every day that you need to execute GUI application commands via command line.
After all there are some GUI applications that simply don't design for it and don't document it.
It really is not a use case that they expect.
GoToMeeting is just one of those applications. It is never anticipated that a person might want to launch a session via a command line.
Well, I recently had such a case. And I have two different ways to handle this.
First, a little bit about the application.
GoToMeeting is a user mode application that is 100% in a user's profile. It is web based, and has a web based launcher that always delivers the latest and greatest client. The client side application is not found under %ProgramFiles%.
Launching / Joining a Meeting:
Method 1 (the modern way):
Method 2 (the legacy way):
This method was the most prevalent result when I searched. Send arguments to g2mstart.exe.
However, this is also the most problematic. GoToMeeting updates its client pretty frequently, and each client is in a new folder, so if you want the latest client you have to do a bit of discovery and you must format the string properly.
It would be improper of me not to focus on the modern way of doing this. The way that is expected. However, the one thing that doing it that way will accomplish is that the client might be forced into an update. If you don't want your client updated, but instead want a nice seamless join, you might want to use the legacy method.
Allow me to present the modern and legacy functions:
Now, using these two functions is identical.
But, being a person who does test I always like a bit of error handling, I hate popup dialogs. And I especially hate dialogs if they interrupt my nice automation - a real buzz killer.
Here I have two checks - 1. is there an existing meeting that I need to kill to connect to a new meeting ("there can be only one" - the Highlander) and 2. Don't start it if one is running.
After all there are some GUI applications that simply don't design for it and don't document it.
It really is not a use case that they expect.
GoToMeeting is just one of those applications. It is never anticipated that a person might want to launch a session via a command line.
Well, I recently had such a case. And I have two different ways to handle this.
First, a little bit about the application.
GoToMeeting is a user mode application that is 100% in a user's profile. It is web based, and has a web based launcher that always delivers the latest and greatest client. The client side application is not found under %ProgramFiles%.
Launching / Joining a Meeting:
Method 1 (the modern way):
Start-Process http://www.gotomeeting.com/join/$g2mIdMethod 2 (the legacy way):
This method was the most prevalent result when I searched. Send arguments to g2mstart.exe.
However, this is also the most problematic. GoToMeeting updates its client pretty frequently, and each client is in a new folder, so if you want the latest client you have to do a bit of discovery and you must format the string properly.
# each version is in its own folder so you have to find the latest / most recent version
$gtmFolder = Get-ChildItem -Path $env:LOCALAPPDATA\Citrix\GotoMeeting | Sort-Object -Property Name -Descending | Select-Object -First 1
# build the path
$g2mstartPath = $gtmFolder.FullName + "\g2mstart.exe"
# Define the arguments - double quotes is important for g2mstart.exe
$g2mArgs = ("'/Action Join' '/MeetingID $g2mId'" ).Replace("'",'"')
# start the meeting
Start-Process -FilePath $g2mstartPath -ArgumentList $g2mArgsIt would be improper of me not to focus on the modern way of doing this. The way that is expected. However, the one thing that doing it that way will accomplish is that the client might be forced into an update. If you don't want your client updated, but instead want a nice seamless join, you might want to use the legacy method.
Allow me to present the modern and legacy functions:
function startG2m
{
Param(
[string]$g2mId
)
# start the meeting
Start-Process http://www.gotomeeting.com/join/$g2mId
Start-Sleep -Seconds 2
        # close the IE tab that was opened
        $ie = (New-Object -COM "Shell.Application").Windows() | where { $_.Name -eq "Internet Explorer" }
foreach ($tab in $ie) {
if ( $tab.LocationURL -match "gotomeeting.com" ) {
do { Start-Sleep -Seconds 1 } until ( $tab.Busy -eq $false )
$tab.Quit()
} }
}
function startG2mLegacy {
Param(
[string]$g2mId
)
# finds the path of g2mstart.exe
# each version is in its own folder so you have to find the latest / most recent version
$gtmFolder = Get-ChildItem -Path $env:LOCALAPPDATA\Citrix\GotoMeeting | Sort-Object -Property Name -Descending | Select-Object -First 1
# build the path
$g2mstartPath = $gtmFolder.FullName + "\g2mstart.exe"
        # Define the arguments - double quotes is important for g2mstart.exe
        $g2mArgs = ("'/Action Join' '/MeetingID $g2mId'" ).Replace("'",'"')
# start the meeting
Start-Process -FilePath $g2mstartPath -ArgumentList $g2mArgs
}Now, using these two functions is identical.
startG2m $g2mIdBut, being a person who does test I always like a bit of error handling, I hate popup dialogs. And I especially hate dialogs if they interrupt my nice automation - a real buzz killer.
Here I have two checks - 1. is there an existing meeting that I need to kill to connect to a new meeting ("there can be only one" - the Highlander) and 2. Don't start it if one is running.
# is there an existing G2M that we need to kill?
# Note - if we reconnect to the same meeting too quickly we will have ourself as an orphaned attendee.
if ($g2mKill) {
if ((Get-Process -Name "g2mui" -ErrorAction SilentlyContinue)) {
"Killing the running G2M"
Get-Process -Name "g2mui" | Stop-Process -Force
Do { Start-Sleep -Seconds 2 } until ((Get-Process -Name g2mlauncher).Handles -lt 500)
} else {"The user was not joined to a G2M"}
}
# is there a G2M video conference running? We will collide if there is.
if (!(Get-Process -Name "g2*conference")) {
if ( $g2mId ){
# Start the G2M
startG2m -g2mId $g2mId
} else { "No G2M ID was provided" }
} else { "A G2M is already running" }Monday, April 20, 2015
Ports and Docker containers
This is the feature of containers that the system administrator in me gets all excited about.
Ports.
This is more than security through obscurity, this is actually about isolated networking.
Docker has an internal network stack all to itself.
You can see it if you type ifconfig. You see a Docker interface (not unlike a Hyper-V Internal network vNIC).
If you have a container running you can use sudo docker ps and one of the columns is 'ports'.
Lets begin with the intermediate of exposing ports.
For my examples I have been using my meshblu image and opening a bash shell and even mapping local file paths into it. I am going to leave those out at the moment.
Now that I have a working model, I want to test it. So I want to expose the listener port of the service running in my container.
sudo docker run -t -t -p 3000:3000 --name meshblu meshblu_appliance
The -p command allows the mapping of ports.
If I only defined -p 3000 I would be allowing port 3000 of the container to be mapped to some random port of the container host. Instead I defined 3000:3000 - so as not to confuse myself.
What this does is map port 3000 of my container to port 3000 of my container host.
If I open any application on my container host or from a remote machine I can now access the application in my container on port 3000. Just like opening a single port in a firewall.
Now. My container has a number of supporting services such as Redis and MongoDB and other ports that the application will be listening on.. I would like to expose these as well. They are there, in the container, running and responding and entirely hidden at the moment.
This is one that I did not consider intuitive.
sudo docker run -t -t -p 3000:3000 -p 1883:1883 -p 5683:5683 --name meshblu meshblu_appliance
Now I have mapped two additional ports. Initially I tried using a single long string or an array (it just made sense) but you need to use individual port commands.
Just some other nifty stuff. And I have not gotten beyond a single container yet.
Tuesday, April 14, 2015
Local file systems and Docker containers
Now I am going to move into the realm of areas that I consider fun.
What sort of trickery can I use containers for so that I can avoid installing 'stuff' on my development workstation?
Here is my scenario: I am pulling some source from GitHub. I might modify some scripts and need to test those. I want to quickly test my changes within an installed and running instance of the application. I don't want to 'install' the application on my workstation.
So, lets work thorough my real life example. No modifications, just pulling the source and getting that into a container, without any need to build a custom container nor image.
Docker allows you to expose paths of the container host and map those into specific paths of the VM. And this is where you can do some nifty things.
Say that you have some Node.js application. And you want to run multiple instances of it, or you want to run and instance and have the logs write back to your development station.
(This could be any number of combinations).
Lets run through an example:
Previously I ended with the example:
sudo docker run -i -t --name meshblu node:latest /bin/bash
If I extend that with this scenario we will see some new options.
sudo docker start -i -t -v "/home/brianeh/GitHub":"/home":ro --name meshblu node:latest /bin/bash
What I have added is the "-v" option. this defines a path mapping.
"/home/brianeh/GitHub" is the GitHub folder of my user home path. After the colon is the path in the container that this is mapped to. "ro" means Read Only. Or I could define that as "rw" - Read Write.
the neat thing is that once I run my container and enter its console I can type ls -l /home and I will see all of the files I have downloaded to my GitHub folder of my development machine.
This gives me a runspace within the container that is separate from my workstation where I can install applications but run the latest version of my code straight out of the development path.
(One reason why developers love containers)
Friday, April 10, 2015
Giving of your Octoblu devices
I realize that the title is not very searchable, and I am okay with that.
After all, this post is all about giving. Actually moving ( handing over, granting, getting rid of ) a device on the Octoblu IoT platform.
To stay true to my Windows roots, I did this in PowerShell ;-)
Here is my scenario, I have been working with a 'device' in Octoblu. I have it all setup, it is working well, there is a flow tied to it, etc. The world is a happy place.
Now, I am done with this. But Joe wants to carry it on and take it to a show and demonstrate it, possibly even enhance the flow.
I developed the entire thing under my account, and I can't give Joe my password.
I could use the template feature and give Joe a device scrubbed version of my flow. But that still requires that the device be deleted from my account and re-created under Joe's. Or Joe has to take the device, reconfigure it and then personalize the flow.
Why not just give Joe my device - and I mean really give it. Not just the physical device, but its representation on the platform and the flow that goes along with it.
To accomplish this I only have to do a few things: I have to add Joe's user account to the device, then Joe needs to claim (take ownership) of that device.
In Octoblu everything is a 'device'; users, things, flows, running flows, etc. A user is just a special type of device.
Octoblu also has a whitelist / blacklist security model that grants or denies access at the very granular device level. You can literally have a device that can only talk to one other device (such as the flow it interacts with) and nothing else.
By default, this is all locked down and your devices are only available to you and to the flows to link them to in the designer.
At the same time, there is no way to 'give this to Joe'.
Let me get to the meat and walk through a few things.
First of all, we will do all of this through the REST API. And the REST API uses your user UUID and secret (they call a token) to authenticate you.
Using this you can authenticate and list your devices.
And get the UUID of the device (or UUIDs of devices) that you want to give.
The next piece of information you need is the UUID of the user you want to give the device to.
The rest is in the script (with some error handling of course).
You can find the source over here: https://github.com/brianehlert/moveOctobluDevice
And you can find the first version below:
# What is the UUID and token of the current device owner?
# and test that it is actually good
Do {
Do {
if (!$deviceOwner) { $deviceOwner = Read-Host -Prompt "What is the uuid of the current device owner? (your account)" }
if (!$deviceOwnerSecret) { $deviceOwnerSecret = Read-Host -Prompt "What is the secret token of the current device owner? (your account)" }
$meAuthHeader = @{
meshblu_auth_uuid = $deviceOwner
meshblu_auth_token = $deviceOwnerSecret
}
$me = Invoke-RestMethod -URI ("http://meshblu.octoblu.com/devices/" + $deviceOwner) -Headers $meAuthHeader -Method Get -ErrorAction SilentlyContinue
} Until ( $me )
# echo back what you find
"The current device owner is: " + $me.devices[0].octoblu.email
} until ( (Read-Host -Prompt "Is this correct? Type 'YES'") -eq 'YES' )
# What is the UUID of the user you will be moving your devices to?
# and test that it is actually good.
Do {
Do {
if (!$deviceNewOwner) { $deviceNewOwner = Read-Host -Prompt "What is the uuid of the new device owner? " }
if (!$deviceNewOwnerSecret) { $deviceNewOwnerSecret = Read-Host -Prompt "What is the secret token of the new device owner? " }
$youAuthHeader = @{
meshblu_auth_uuid = $deviceNewOwner
meshblu_auth_token = $deviceNewOwnerSecret
}
If ($deviceNewOwnerSecret) {
$you = Invoke-RestMethod -URI ("http://meshblu.octoblu.com/devices/" + $deviceNewOwner) -Headers $youAuthHeader -Method Get -ErrorAction SilentlyContinue
} else { $you.devices.octoblu.email = "No token provided. Unable to validate" }
} until ($you)
# echo back what you find
"The new device owner will be: " + $you.devices[0].octoblu.email
} until ( (Read-Host -Prompt "Is this the correct new device owner? Type 'YES'") -eq 'YES' )
# List all of 'my devices' in a nice, neat way with the important bits - name, uuid, device type
$devices = Invoke-RestMethod -URI http://meshblu.octoblu.com/mydevices -Headers $meAuthHeader -Method Get
# Which device will you be moving to another user?
# base on device name as everything associated in the case of Gateblu needs to go.
Do {
$devices.devices | Sort-Object Name | Format-Table -AutoSize name, uuid, type, subtype, online
Do {
if (!$nameToMove) { $nameToMove = Read-Host -Prompt "What is the name of the device you will be moving to the other user? (this is a match)" }
$deviceToMove = $devices.devices -match $nameToMove }
Until ( $deviceToMove )
"The following device(s) matched: "
$deviceToMove | Format-Table -AutoSize Name, UUID
} until ( (Read-Host -Prompt "proceed to move your device(s)? Type 'YES'") -eq 'YES' )
# The device only needs to be discoverable to take ownership.
foreach ( $device in $deviceToMove ) {
If ( $device.discoverWhitelist ) {
$device.discoverWhitelist += $deviceNewOwner
$json = @{
"discoverWhitelist" = $device.discoverWhitelist
  }
} else {
$json = @{
"discoverWhitelist" = $deviceNewOwner
}
}
$json = $json | ConvertTo-Json
# make the device discoverable by the new owner
Invoke-RestMethod -URI ( "http://meshblu.octoblu.com/devices/" + $device.uuid ) -ContentType "application/json" -Body $json -Headers $meAuthHeader -Method Put
If ( $youAuthHeader.meshblu_auth_token ) {
# claim the device as the new owner
# only if you know the token - otherwise the other user will need to do that
Invoke-RestMethod -URI ("http://meshblu.octoblu.com/claimdevice/" + $device.uuid ) -ContentType "application/json" -Headers $youAuthHeader -Method Put
}
}
After all, this post is all about giving. Actually moving ( handing over, granting, getting rid of ) a device on the Octoblu IoT platform.
To stay true to my Windows roots, I did this in PowerShell ;-)
Here is my scenario, I have been working with a 'device' in Octoblu. I have it all setup, it is working well, there is a flow tied to it, etc. The world is a happy place.
Now, I am done with this. But Joe wants to carry it on and take it to a show and demonstrate it, possibly even enhance the flow.
I developed the entire thing under my account, and I can't give Joe my password.
I could use the template feature and give Joe a device scrubbed version of my flow. But that still requires that the device be deleted from my account and re-created under Joe's. Or Joe has to take the device, reconfigure it and then personalize the flow.
Why not just give Joe my device - and I mean really give it. Not just the physical device, but its representation on the platform and the flow that goes along with it.
To accomplish this I only have to do a few things: I have to add Joe's user account to the device, then Joe needs to claim (take ownership) of that device.
In Octoblu everything is a 'device'; users, things, flows, running flows, etc. A user is just a special type of device.
Octoblu also has a whitelist / blacklist security model that grants or denies access at the very granular device level. You can literally have a device that can only talk to one other device (such as the flow it interacts with) and nothing else.
By default, this is all locked down and your devices are only available to you and to the flows to link them to in the designer.
At the same time, there is no way to 'give this to Joe'.
Let me get to the meat and walk through a few things.
First of all, we will do all of this through the REST API. And the REST API uses your user UUID and secret (they call a token) to authenticate you.
Using this you can authenticate and list your devices.
And get the UUID of the device (or UUIDs of devices) that you want to give.
The next piece of information you need is the UUID of the user you want to give the device to.
The rest is in the script (with some error handling of course).
You can find the source over here: https://github.com/brianehlert/moveOctobluDevice
And you can find the first version below:
# What is the UUID and token of the current device owner?
# and test that it is actually good
Do {
Do {
if (!$deviceOwner) { $deviceOwner = Read-Host -Prompt "What is the uuid of the current device owner? (your account)" }
if (!$deviceOwnerSecret) { $deviceOwnerSecret = Read-Host -Prompt "What is the secret token of the current device owner? (your account)" }
$meAuthHeader = @{
meshblu_auth_uuid = $deviceOwner
meshblu_auth_token = $deviceOwnerSecret
}
$me = Invoke-RestMethod -URI ("http://meshblu.octoblu.com/devices/" + $deviceOwner) -Headers $meAuthHeader -Method Get -ErrorAction SilentlyContinue
} Until ( $me )
# echo back what you find
"The current device owner is: " + $me.devices[0].octoblu.email
} until ( (Read-Host -Prompt "Is this correct? Type 'YES'") -eq 'YES' )
# What is the UUID of the user you will be moving your devices to?
# and test that it is actually good.
Do {
Do {
if (!$deviceNewOwner) { $deviceNewOwner = Read-Host -Prompt "What is the uuid of the new device owner? " }
if (!$deviceNewOwnerSecret) { $deviceNewOwnerSecret = Read-Host -Prompt "What is the secret token of the new device owner? " }
$youAuthHeader = @{
meshblu_auth_uuid = $deviceNewOwner
meshblu_auth_token = $deviceNewOwnerSecret
}
If ($deviceNewOwnerSecret) {
$you = Invoke-RestMethod -URI ("http://meshblu.octoblu.com/devices/" + $deviceNewOwner) -Headers $youAuthHeader -Method Get -ErrorAction SilentlyContinue
} else { $you.devices.octoblu.email = "No token provided. Unable to validate" }
} until ($you)
# echo back what you find
"The new device owner will be: " + $you.devices[0].octoblu.email
} until ( (Read-Host -Prompt "Is this the correct new device owner? Type 'YES'") -eq 'YES' )
# List all of 'my devices' in a nice, neat way with the important bits - name, uuid, device type
$devices = Invoke-RestMethod -URI http://meshblu.octoblu.com/mydevices -Headers $meAuthHeader -Method Get
# Which device
# base on device name as everything associated in the case of Gateblu needs to go.
Do {
$devices.devices | Sort-Object Name | Format-Table -AutoSize name, uuid, type, subtype, online
Do {
if (!$nameToMove) { $nameToMove = Read-Host -Prompt "What is the name of the device you will be moving to the other user? (this is a match)" }
$deviceToMove = $devices.devices -match $nameToMove }
Until ( $deviceToMove )
"The following device(s) matched: "
$deviceToMove | Format-Table -AutoSize Name, UUID
} until ( (Read-Host -Prompt "proceed to move your device(s)? Type 'YES'") -eq 'YES' )
# The device only needs to be discoverable to take ownership.
foreach ( $device in $deviceToMove ) {
If ( $device.discoverWhitelist ) {
$device.discoverWhitelist += $deviceNewOwner
$json = @{
"discoverWhitelist" = $device.discoverWhitelist
}
} else {
$json = @{
"discoverWhitelist" = $deviceNewOwner
}
}
$json = $json | ConvertTo-Json
# make the device discoverable by the new owner
Invoke-RestMethod -URI ( "http://meshblu.octoblu.com/devices/" + $device.uuid ) -ContentType "application/json" -Body $json -Headers $meAuthHeader -Method Put
If ( $youAuthHeader.meshblu_auth_token ) {
# claim the device as the new owner
# only if you know the token - otherwise the other user will need to do that
Invoke-RestMethod -URI ("http://meshblu.octoblu.com/claimdevice/" + $device.uuid ) -ContentType "application/json" -Headers $youAuthHeader -Method Put
}
}
Subscribe to:
Posts (Atom)