Tuesday, December 22, 2009

Hypervisor virtualization basics a visual representation

For all of you that want a place to point folks to describe the basics of virtualization, I have put together a few videos to describe the hypervisor, CPU, and network concepts in a visual way.

The intent is to give a quick amount of conceptual information to those folks that suddenly are dealing with VMs, but might not have the experience to fully understand what they are looking at.

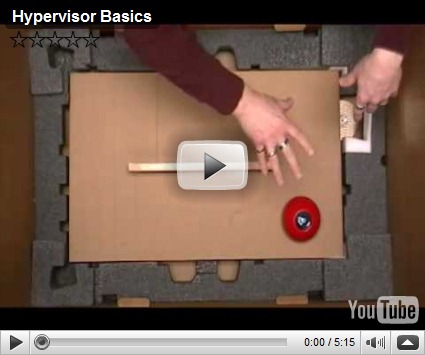
Hypervisor Basics:

The basics of what a full (type 1) hypervisor is.


The hypervisor pool of resources – the CPU:

The basics of CPU scheduling. It is far more complex than this and there are many methods.  It gets really messy when hyper-threading is introduced.

More CPU scheduling details are over at the Xen.org site (the Xen folks are more open in discussing the gritty details of all this):  http://wiki.xen.org/xenwiki/CreditScheduler

The hypervisor pool of resource – the network:

This is about virtual networks / virtual switches / bridging.  The concepts, as each vendor implementation offers different features.

Thursday, December 17, 2009

Datamation puts their angle on the big three virtualization vendors

Datamation has put their spin and opinion into the world of virtualization and the virtualization engines and offerings in this comparison of Citrix (XenServer), Microsoft (Hyper-V, SCVMM), and VMware (ESX, vCenter).

Mind you, this is a judgment article – But it mentions Kensho – a project very near to my personal efforts, and DocFinder – another product I was involved in the infancy of.

You can find the article here:

http://itmanagement.earthweb.com/features/article.php/12297_3853716_1/Virtual-Server-Comparison-Xen-vs-Microsoft-vs-VMware-2010.htm

Friday, October 16, 2009

Remote Desktop Simulation Tools

Microsoft has recently released a very interesting tool, that can be useful in scoping the performance and capacity of a Remote Desktop deployment.

It is all Server 2008 and above based – Hyper-V of course and I am sure it is RDS centric, however I wonder how creative I can be in applying its capabilities to other scenarios or hosting systems.  As I can see this being very useful in making comparisons between supporting layers.

The Remote Desktop Simulation Tools

http://www.microsoft.com/downloads/details.aspx?FamilyID=c3f5f040-ab7b-4ec6-9ed3-1698105510ad&displaylang=en


A quote from the download page:

The Remote Desktop Load Simulation toolset is used for server capacity planning and performance/scalability analysis.
In a server-based computing environment, all application execution and data processing occur on the server. Therefore it is extremely interesting to test the scalability and capacity of servers to determine how many client sessions a server can typically support under a variety of different scenarios. One of the most reliable ways to find out the number or users a server can support for a particular scenario is to log on a large number of users on the server simultaneously. The Remote Desktop Load Simulation tools provide the functionality which makes it possible to generate the required user load on the server.

A minimal test environment requires:

  1. Target Remote Desktop Server
  2. Client Workstations
  3. Test Controller Host

Friday, October 9, 2009

Importing Kensho OVF to ESX

My main focus has been in taking OVF content from other vendors and consuming that with Citrix Kensho (the OVF Tool or XenConvert 2.x) – however lets turn the tables.
OVF is a format that describes virtual appliances; these could be single or multiple machine.  In doing so, OVF describes the virtual hardware and physical requirements of each machine.
In the spirit of supporting the development of interoperability between vendors I also consider how other vendors consume OVF appliances.
I have my personal opinion of how things should work, but the DMTF VMAN is a committee, therefore there are many opinions.
At the same time, the promise of interoperability is as much in the hand of the consume of an appliance as it is in the creator, as it is in the operating system of the machine in the appliance.
Lets look at using VMware Products (as released today 10/9/2009) to consume a Citrix Kensho created OVF appliance. 
Well, I am going to be honest – at this time VMware does not translate other vendors hardware descriptions into VMware equivalents – therefore VMware cannot import OVF content that does not adhere to the VMware way of describing the hardware of a virtual machine.
So, knowing that, is there a workaround?  Yes, there is.
In my example I am going to use XenConvert to create an OVF Appliance from a XenServer XVA (that is an export of a XenServer VM), modify that using a VMware created OVF, and then import to ESX.
Mind you, this is not for the easily sickened, nor is it something you want to do every day.
First of all, I begin by downloading the Citrix Merchandising Server virtual appliance. I also use XML Notepad, ESX, and VMware Converter.  (Please note that following this process will NOT magically make the Merchandising Server work on ESX - you need to use the appliance built for VMware)
[1] Expand the Merchandizing bz2 zip archive. (WinRAR can do this, and others as well)
[2] Use Citrix XenConvert 2.x to convert from “Xen Virtual Appliance” to “Open Virtualization Format (OVF) Package
Do not create an OVA, just an OVF.
[3] Using the VMware Client:
a. Create a shell VM using Linux / RedHat Enterprise Linux 5 (32-bit)
b. Select the VM that was created and export it to an OVF appliance
· VI3 = Select VM, File, Virtual Appliance, Export
· vSphere4 = Select VM, Export
[4] Open both folders containing the OVF appliance from XenConvert and the OVF appliance from VMware.
Note that both folders contain common items: a virtual disk file, and a .ovf metafile that describes the settings of the appliance.
clip_image002
[5] Copy the VHD from the XenConvert created appliance to the folder of the VMware created appliance
clip_image004
[6] Open the .ovf XML metafile from both appliances using XML Notepad
[7] Open the two references to the virtual disk
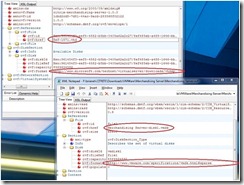
There are two important sections that need to be modified in the VMware OVF so that it will properly ‘see’ the VHD. The ‘name’ of the virtual disk and the ‘format’.
clip_image005
[8] Copy the disk reference sections from the XenConvert created appliance to the VMware created appliance.
clip_image006
[9] Save the changes
[10]If the VMware appliance folder contains a file ending in .mf – delete it
[11]Using VMware Converter import the modified VMware OVF appliance.
Only VMware Converter can both consume the OVF and convert the VHD to VMDK.
a. Open VMware Converter
b. Select Convert Machine
c. Choose virtual appliance, browse to the modified OVF
d. Select Next
e. Complete the import wizard
The preceding steps converted the Merchandising Server XVA based appliance to OVF and then used a VMware derived OVF to import the appliance to VMware. The operating system within the appliance still needs to be repaired to allow the machine to boot and run.
Hopefully, I will have a solution for that in the near future.  As there are currently many challenges inherent within the operating system of the machines themselves that prevent true interoperability.

Thursday, September 24, 2009

Enabling Citrix Merchandising Server paravirtualized vm to run on Hyper-V

Be warned, Citrix Support will not support your Merchandising Server if you follow these steps.

And - this is really antique and no longer works with Hyper-V 2012.

Here is my scenario:

I have a fully paravirtualized Linux virtual machine (Merchandising Server) that is made to run on a xen hypervisor (the family of hypervisors that enable Linux VMs to boot kernel-xen and run in a truly paravirtualized and highly efficient way).
I want to move that vm over to another hypervisor (non-xen) for a client demonstration.
Warning:  This might seem a bit convoluted, but it really isn’t difficult.  However there are a few tools involved.  The steps that apply to your situation all depends on how easy it is to get your virtual disk into a format that you can mount and edit the boot volume.  Follow these instructions at your own risk, a positive outcome is not guaranteed.  The resulting VM will most likely not be supported if it has problems.
Collecting the elements:
I am going to use a few things that I need to obtain (download) and tools that need to be installed.

Why so many tools?

The Merchandising Server is the appliance that I am using for the example.  XenConvert is to convert the XVA (XenServer export format) into an OVF based appliance.  The Kensho OVF Tool is to import the OVF into Hyper-V.  The Linux distribution “Live CD” is to mount the virtual disk of the example appliance so we can modify the Grub boot loader and drop a file.  And the v1 Linux Integration Components have the magic PV kernel shim that we need.

Details, details, missing details.  What gives?

I am going to state right now that; I am not going to go into deep and gory details describing each and every click that is required with each tool.  If you read my blog, I assume a couple things: that you have a clue, or you want one.  And that you are not afraid of figuring things out, or trying and failing (I am also implying that you know how to make back-ups of things before you go mucking them up).

The business at hand:

  1. Expand the Merchandizing bz2 zip archive. (WinRAR can do this, and others as well)
  2. Use Citrix XenConvert 2.x to convert from “Xen Virtual Appliance” to “Open Virtualization Format (OVF) Package
    • Do not create an OVA, just an OVF.
  3. Use Citrix Kensho OVF Tool to Import the OVF Package from step 2 to a Hyper-V host.
    • Or you could just copy the VHD from step 2 to your Hyper-V host and create a new VM.
    • Do not boot the VM at this time.
  4. Attach the Live CD ISO to the VM
  5. Set the boot order to boot from DVD first
  6. Remove the default Network Adapter and add a Legacy Network Adapter
  7. Add a second DVD drive
  8. Attach the Hyper-V (v1) Linux IC ISO to the second DVD drive of the VM
  9. Boot the VM into the Live CD and log in to its console
    • Debian will auto logon as ‘user’.
  10. switch to root:  sudo –i
    • This is specific to Debian Live
  11. Discover the IDE disks:
    • cd /dev
    • ls hd*
  12. Mount the virtual disk (the vhd)
    • make a mount point folder:  mkdir /mnt/mine
    • mount the disk to the folder:  mount /dev/hda1 /mnt/mine
  13. explore the volume
    • cd /mnt/mine
    • ls
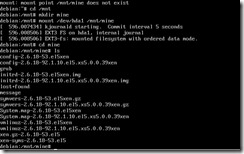
    • Mine looks like a /boot volume:
    • clip_image001
  14. Mount the Linux IC DVD drive (mine is the second dvd on controller 2):
    • mkdir /mnt/cdrom
    • mount /dev/hdd /mnt/cdrom
  15. Copy the kernel shims from the ISO to the virtual disk
    • cd /mnt/cdrom/shim
    • cp *.* /mnt/mine
  16. Edit the device.map
    • cd /mnt/mine/grub
    • nano device.map
    • Before: clip_image002
    • After: clip_image003
  17. Edit the GRUB bootloader to load the shim and the kernel.
    1. nano menu.lst
    2. comment the ‘hiddenmenu’ option and increase the timeout so I can test.
      • clip_image004
    3. Create a new entry specific to the shim and the distribution kernel-xen
      • Notice that the kernel is the shim copied from the previous step and the existing kernel and initrd load as modules of the shim.
      • clip_image005
    4. Modify the default selection to point to my new entry.
      • The default entry begins counting at “0”
      • clip_image006
  18. Unmount the virtual disk and the cdrom
    • cd /
    • umount /dev/hda1
    • umount /dev/hdd
  19. Shutdown the virtual machine and remove the ISOs from the DVD drive (also remove the second virtual dvd drive).
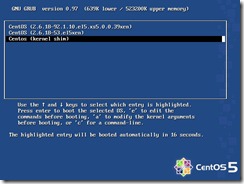
  20. Boot the virtual machine, note the new menu selection that was created – this is the kernel that should boot.
    • clip_image007
Note: If you run VMware – This will not run on VMware, the shim is specific to Hyper-V.

Thursday, September 17, 2009

HyperV networking works on Server 2008 R2 guest but not Server 2008 guest

The Scenario:

Hyper-V R2 (Server 2008 R2) host, Server 2008 guest (not R2), Server 2008 R2 guest

The situation plays out like this:

I create a VM and install Server 2008 R2 Standard.

The external network, connecting me to the internet, works fine and the guest OS automatically has a working network device and connection.

I shut down this VM and leave it off.

I then create another VM, exactly the same, choosing the same external network as above. This time I install Server 2008 Standard (non-R2).

The server does not find its network card, and therefore cannot connect to the internet. When I look at the guest OS, there is a yellow splat in the device manager for the virtual network adapter.


My first question in response to this:

Did you install the Integration Components within the VM?


Here is why:
Server 2008 has the ICs built in to the OS (they are extremely similar to device drivers).

But, versioning issues can come into play - the host and guest must match for optimum performance.

With the release of R2 the ICs included backward compatibility - thus allowing an R2 VM to 'just work' when you install it onto a Hyper-V v1 (2008, but not 2008 R2) host.

Now, when you have a Server 2008 VM on an R2 host - the VM built-in ICs are older than the host ICs - thus the ICs in the VM need to be updated.

Using the Hyper-V manager Console, open the console of the VM and choose Action, Install Integration Services - then respond to any prompts.

Thank you “Kelly AZ” for describing this problem so well in the TechNet forum.

http://social.technet.microsoft.com/Forums/en-US/winserverhyperv/thread/c08e2f66-802b-43b0-aa9c-589695c31678/

Tuesday, September 15, 2009

Importing VMware Studio with Citrix OVF Tool to Hyper-V

This is something that I just had to try.

I imported the VMware Studio 2 Beta virtual appliance to a Hyper-V R2 host using Citrix OVF Tool.  Quite fun actually, and pretty easy.

Yes, I did a video, just to prove it.

http://www.citrix.com/tv/#video/1070

First, the preparation:

Begin by creating a Network Share for your OVF Library.

Create a folder under that for the VMware Studio appliance download.

Download the VMware Studio 2 virtual appliance and place it in the folder you created.

Download and install the Citrix OVF Tool.

http://community.citrix.com/display/xs/Kensho

(please download the admin guide as well – it hides behind the “show documentation” link).

Read the Admin Guide.

Second, Run the Citrix OVF Tool.

Add your library share.

Add your Hyper-V host (I am assuming that you read the admin guide and set up Windows Remote Management properly).  Also shown here: http://www.citrix.com/tv/#video/971

Select the Import tab of the OVF tool.

Select and then right-click the VMware Studio OVA and select Convert to OVF.

After the convert process has finished select the VMware Studio OVF, Select the target Hyper-V Host, then select the mapping button.

Complete the VM requirement to host resource mapping wizard.

Select the check box to run the Operating System Fix-up (this is important).

Begin the import.

After the import completes open the Hyper-V manager, and open the settings of the imported vm most likely called “Virtual Hardware Family”

Remove the “Network Adapter”, then add a “Legacy Network Adapter”, and select the virtual network that it should be attached to.

Now you can boot the VMware Studio appliance and complete the setup.

There you have it, simple as that, running on Hyper-V.

Monday, September 14, 2009

Another boot from VHD article

I have seen lots of instructions about booting from a VHD.  A new Windows 7 feature (actually a feature of the new Windows bootloader that is part of Win 7 and Server 2008 R2).

This is a component of the native VHD support that is part of the latest release.

Anyway, on MSDN of all places I stumble upon some nicely written, easy to follow instructions of how to do this. (I find it when I am not looking for it – go figure).

My gratitude to Charlie Calvert for posting.

http://blogs.msdn.com/charlie/archive/2009/09/02/booting-from-a-vhd.aspx

Wednesday, August 26, 2009

KMS Client Setup Keys

I always have the hardest time searching for this each time I need it again.
Vista and above (Vista, Server 2008 and higher) have this wonderful KMS licensing system.  That is all fine and dandy.
During installation and creation of virtual machines, I frequently run into situations where I must provide a product key either during installation or for the sysprep process to allow mini-setup to complete.
I don’t want the recipients of my virtual machines to have to input a personal product key as we run KMS – I want that to all happen silently in the background.
Today, I had to go searching all over again – 30 minutes later I finally find the magic combination of search phrases that get me where I needed to go.
I actually did a search that I knew would take me to a TechNet forum post that I made in the past, that I knew had the answer in it.  Basically, searching for my own answer that I had not used in such a long time that I couldn’t even recall the ‘proper’ title for it.
Both Google and Bing failed me until I decided to go looking for my own forum post.
http://technet.microsoft.com/en-us/library/cc303280.aspx#_KMS_Client_Setup
The link to the Volume Activation 2.0 Deployment Guide – KMS Client Setup Keys

The Windows 7 and Server 2008 R2 Setup keys:
http://technet.microsoft.com/en-us/library/ff793406.aspx

Saturday, August 22, 2009

The basics of VDI

VDI is a term that is thrown around a lot lately and in many ways.
the acronym stands for Virtual Desktop Infrastructure.

In its most basic description, this simply means that the operating system runs in a location that is separate from the end use the is interacting with the operating system (and using applications that are running within it).

This is only one form of virtualization, which is also becoming a pretty broad reaching term in the computer industry and encompasses many forms of technologies and ways of presenting workloads.

In my definition I stated that the operating system runs in a location separate from the end user. What does this mean?
The operating system can be installed on a PC, or a blade system, or in a virtual machine. Most commonly these will be in some type of data center, but they don't have to be.

I need to mention that MSFT has recently muddied the waters by using the term Remote Desktop Services to both describe VDI and Terminal Services (and possibly the application formerly known as SoftGrid) - a very generic marketing term to encompass the many ways to use various virtualization technologies to get an application to a user. When it gets down to implementation and design - it is important to separate each of these individual virtualization technologies.

Technologies that loosely enable VDI have been around for years and vary greatly. Back in the stone ages of IT we had PCAnywhere and a modem, we would dial directly into an awaiting PC and use its desktop from some other location. Today we have a similar technology called GoToMyPC. These were great for very simple one to one relationships of user to desktop.

Over time all of that has grown up into the enterprise level products that we call VDI today. In today's scenario the relationship and control is far different. It could be many users to a single source desktop (desktop pool), or the more traditional one to one (CEO to specific desktop).
This has evolved out of the need for both flexibility, control, and security. You no longer have to worry about the financial broker losing his laptop as there is no data on it - it becomes 'just a laptop'.
Today, most VDI infrastructures have some basic, common, components.

1) the end user
2) a control portal or broker
3) a transport / remoting protocol
4) the resulting target operating system

I don't think that I need to describe the end user.

The Broker is the portion of the infrastructure that provides access control - the user is required to authenticate, the broker checks that an assigned resource is available and then connects the two together. It also monitors the back end resources, sessions, prepares additional resources, etc.

The transport is how the devices at the end user remote back into the OS, as well as how the console of the OS (plus mouse and keyboard) get to the user. Again, back in the stone age there was VNC. And it is still around today. However, that basic KVM style remoting is giving way to RDP and ICA. From Microsoft and Citrix respectively. These are the protocols and not the client application that actually runs at the remote OS or the client device.

The target operating system is the operating system that resides in the data center or on-premise device. It is here that the applications actually execute.

There is also the more traditional Terminal Services which is strictly session remoting and uses one server to run many individual instances of an application and possibly a desktop.
These two technologies do directly cross over each other and in many cases Presentation Server or Terminal Server are a better fit than a full VDI infrastructure.

What is required in implementing a VDI infrastructure?
Physical resources.
Places to run the workloads - hypervisor or blade systems.
Storage - that operating system needs to write and remember, as do the applications. In the case of pooled desktops, don't forget user profiles.

This entire article was prompted by a former co-worker of mine, Jeff Koch ('cook' that is). And I am sure that he will ask questions that force me to continue to expand.

Friday, August 21, 2009

Importing the virtual machine succeeded but with the following warning.

When importing a virtual machine to Hyper-V R2 you might see the following error dialog:

Importing the virtual machine succeeded but with the following warning.

Import completed with warnings.

I have seen this error quite a bit, and I must say that it is no reason for panic.  Your VM is safe.

If you open the error and read the detail, you will see what really went wrong.  (Click on that See details down arrow).

Well, psyche.  That details box is rarely helpful – it simply points you to the proper event log- then you being digging.

Each time I have seen this error the repair has been the same.  Simply open the settings of the virtual machine and connect the virtual NIC to the proper virtual network switch.

Also, each time I have seen this the leading events have been the same.  I created the Export from Hyper-V v1 and I am importing to Hyper-V R2.

Thursday, August 20, 2009

Project Kensho Demonstration Videos

Here are the instructional videos for Project Kensho.

1. http://www.citrix.com/tv/#video/956 Installing the OVF Tool

2. http://www.citrix.com/tv/#video/963 Installing the XenServer-CIM

3. http://www.citrix.com/tv/#video/965 Using the OVF Tool (the Basics)

4. http://www.citrix.com/tv/#video/970 Using the OVF Tool (Advanced)

5. http://www.citrix.com/tv/#video/971 Using the OVF Tool with Hyper-V

Wednesday, August 19, 2009

Thinking in Workloads with OVF

Many of you realize that I am pretty close to the Citrix Project Kensho OVF Tool.

Frankly, I find it as a very useful tool with some very useful features.

First of all – let me mention a bit about OVF again.  OVF is NOT a method of converting virtual machines.  OVF is a way to describe a virtual appliance using standardized XML tags, so that various platforms can consume and use that virtual appliance as it was defined.

A virtual appliance has traditionally been though of as a single virtual machine (thank you VMware).  However, a virtual appliance is actually a “workload.”

Many of you might realize that an enterprise application is rarely a simple single .exe file that simply runs on a desktop.  A very simple reporting application might be an executable, a SQL database, and even a document archiving system.  All of these entities grouped together is the workload.

It takes all of these pieces working together for the application to be fully functional and feature rich.  The Application Workload would be a better way to describe this.

In the same light there is a component that might participate in multiple workloads – the SQL server can serve databases to multiple front-end and back-end applications.  It would have the most complex relationship in this example.

This brings me pack to the virtual appliance – the OVF is a description of the workload.  This example has that defined as two servers and one client.

If you are the person creating the package, you might leave the client out of the package, or only deliver the client executable as a component of the package, but it is not imported to a virtualization host as a virtual machine.

Some might call this creative thinking, but really it is just taking what the OVF allows and applying that to real situations.

The OVF standard (VMAN at the DMTF) is still evolving and changing.  And vendors are still working on compatibility and pushing those standards to ever complex designs.

It is because of this that not all vendors support each other.  They have to choose to allow for consumption of other implementations of the OVF standard.  Yes, this gets very complex and interwoven and creates a bummer for some folks that see OVF as the answer to virtual machine portability – when that portability has far more to do with the applications and operating systems within the virtual appliance themselves than it does in the depths of an XML file.

Tuesday, August 18, 2009

Citrix Kensho releases 1.3

After what seems like months of work (pretty close), version 1.3 of Citrix Project Kensho releases with enhanced OVF capabilities.

Some of you are aware that Project Kensho is the Citrix set of tools that have been developed at Citrix Labs, in Redmond, WA.

Support for creating and consuming OVF content from XenServer, Hyper-V (v1 and R2), and consumption of VMware OVF packages are the major features.

There were a few technical hurdles along the way – not to mention adding OVF support into XenConvert with the 2.0 release.

You can find out more about it here:

All that I ask is that you download, use it, and report back to the forums.  Hopefully, no one finds an issue that I don’t already know about ;-)

http://community.citrix.com/display/xs/Kensho

Tuesday, July 21, 2009

More about Chimney and TCPOffload in Hyper-V

Here are some definitions that help to clarify the TCPOffload and Chimney thing really well.

I have Don from the Hyper-V networking team to thank for the detail.  Being a hard-core networking guy he knows his packets.

Chimney, also known as TCP Chimney Offload, is the offloading of all IP and TCP processing to the NIC.  This means the NIC receives the packet, processes the headers, generates the ACKs, and keeps all the state.  On the outbound side it receives a block of data from the app, packetizes it, generates the headers, generates the IP layer, and ships it.  Chimney is available on some Broadcom NICs.


Checksum offload is the offloading to the NIC the responsibility for generating the header checksums (outbound side) and verifying the header checksums (inbound side).  No header processing is done other than the checksum processing.  No state is maintained in the NIC.  Nearly all server class NICs support checksum offload.


Large Send Offload (LSO and LSOv2) is the offloading, on the send side, of the packetization and header generation.  The hardware takes a large data block and, using state information from the stack, generates appropriate size data packets (including the headers).  The state is kept in the stack.  LSO and LSO v2 are different versions of this feature.  LSOv2 is supported in R2.


In summary: if you are using Chimney you receive the benefits of the other two.  Disabling Chimney does not disable either LSO/LSOv2 or checksum offload.

Thursday, July 16, 2009

Chimney and TCPOffload on Hyper-V

Lately there have been a bunch of issues that folks are running into regarding TCPOffloading on Hyper-V server.

This is not a new issue to Windows Servers.  This is an old tweak that goes back a long time.  And disalbing the TCPOffloading options on Application Servers, Terminal Servers, SQL Servers, etc. has been a pretty common practice for years.

The biggest confusion of late has come form Chimney offloading and TCPOffloading – they are not the same thing.

Chimney is a new feature with Windows 2008 R2 and adds a great deal of performance improvement in a very few cases – it does not kick in all the time or for all traffic.

Chimney and the TCPOffloading that we are referring to is not the same thing.  The cases where Chimney actually kicks in are really pretty small, the vast majority of the time it is never touched.
Leaving Chimney on very rarely has a negative impact.
TCPOffloading (checksum, large send, etc.) can cause problems.  As it does more to affect how packets flow.

TCPOffloading includes the older functions; checksum, large send, etc.

To disable TCPOffload on Hyper-V Server or Server Core:

Check this out:
http://social.technet.microsoft.com/Forums/en-US/winservercore/thread/d0c55df9-a27c-4876-bc5a-8ac7f1b46462

http://msdn.microsoft.com/en-us/library/aa938424.aspx

Chimney and the TCPOffloading that we are referring to is not the same thing.  The cases where Chimney actually kicks in are really pretty small, the vast majority of the time it is never touched.


Leaving Chimney on very rarely has a negative impact.
TCPOffloading (checksum, large send, etc.) can cause problems.  As it does more to affect how packets flow.

To disable Chimney (which you most likely would never need to do):

netsh interface tcp set global chimney=disabled

Thursday, July 9, 2009

Terminal Server on Hyper-V

Microsoft is finally (publically) talking about Terminal Server on Hyper-V.

Please note that it isn’t Terminal Server anymore, but “Remote Desktop Services”. This is closer to the way that Citrix talks about desktops and delivery of desktops and applications.

However, in this case it is rather confusing as Remote Desktop Service (without the s) is what has been referred to as the server side of RDP (the protocol) or the remote desktop client.  Just remember, MSFT uses RDP all over the place now.  If it is remote, RDP is involved.

Enough of that, here is the RDS Team blog post I am referring to:

http://blogs.msdn.com/rds/archive/2009/06/24/running-ws08-terminal-server-as-a-virtualized-guest-under-windows-server-2008-r2-hyper-v.aspx

And a snippet:

Running WS08 Terminal Server as a virtualized guest under Windows Server 2008 R2 Hyper-V

One question that the RDS team is asked is whether running Terminal Server virtualized is supported and recommended.  To answer this question we’ve recently conducted some performance testing of this configuration using WS08 Terminal Server running as a guest on Windows Server 2008 R2 Hyper-V.   To answer the first part: this is a supported scenario.

Wednesday, July 1, 2009

Linux vm from VMware to XenServer the videos

If you have been following, you will note quite a few posts related to importing / migrating Linux virtual machines from VMware to XenServer.

I realize that many folks don’t use XenServer – but the basic steps of repairing after migration apply to Hyper-V just as well as to XenServer – the steps are the same if you want your VM to boot. However, PV enablement on Hyper-V does not exist, you just need to install the vm tools.

Here are the links in case you missed them:

I have turned three of these into short (less than 10 minutes) video presentations, just to add a bit more information than in the articles.

Monday, June 29, 2009

PV enabling an HVM from VMware on XenServer (SLES and Debian)

As a condition for paravirtualization to work, a kernel that supports the Xen hypervisor needs to be installed and booted in the virtual machine. Simply installing the XenServer tools within the vm does not enable paravirtualization of the vm.

In this example; the virtual machine was exported as an OVF package from VMware and imported into XenServer using XenConvert 2.0.1.

Installing the XenServer Supported Kernel:

1. After import, boot the virtual machine and open the console.

2. (optional) update the modules within the vm to the latest revision

a. If the kernel-xen package is installed from an online repository – best practice is to fully update the distribution to avoid problems between package build revisions.

3. Install the Linux Xen kernel.

a. yast install kernel-xenpae

i. the xen aware kernel is installed and entries are created in grub

ii. x64 can use kernel-xen, x86 requires kernel-xenpae

iii. This is not the same as installing “xen” which installs a dom0 kernel for running vms, not a domU kernel for running as a vm.

iv. yast is the package installer for SLES, Debian uses apt (apt-get).

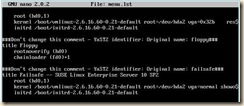
4. Modify the grub boot loader menu (the default entries are not pygrub compatible)

Open /boot/grub/menu.lst in the editor of your choice

clip_image002

a. Remove the kernel entry with ‘gz’ in the name

b. Rename the first “module” entry to “kernel”

c. Rename the second “module” entry to “initrd”

i. SuSE and Debian require that entries that point to root device locations described by a direct path such as: “/dev/hd*” or “/dev/sd*” be modified to point to /dev/xvd*

d. (optional) Modify the title of this entry

e. Edit the line “default=” to point to the modified xen kernel entry

i. The entries begin counting at 0 – the first entry in the list is 0, the second entry is 1 and so on

ii. In our example the desired default entry “0”

f. (optional) Comment the “hiddenmenu” line if it is there (this will allow a kernel choice during boot if needed for recovery)

g. Save your changes

clip_image004

1. Edit fstab because of the disk device changes

a. open /etc/fstab in the editor of your choice.

clip_image006

b. Replace the “hd*” entries with “xvd*”

clip_image008

c. Save changes

2. Shut down the guest but do not reboot.

a. Shutdown now -h

Edit the VM record of the SLES VM to convert it to PV boot mode

In this example the VM is named “sles”

5. From the console of the XenServer host execute the following xe commands:

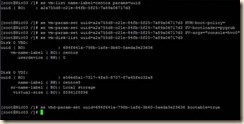
a. xe vm-list name-label=sles params=uuid (retrieve the UUID of the vm)

b. xe vm-param-set uuid=<vm uuid> HVM-boot-policy=”” (clear the HVM boot mode)

c. xe vm-param-set uuid=<vm uuid> PV-bootloader=pygrub (set pygrub as the boot loader)

d. xe vm-param-set uuid=<vm uuid> PV-args="console=tty0 xencons=tty" (set the display arguments)

i. Other possible options are: “console=hvc0 xencons=hvc” or “console=tty0” or “console=hvc0”

6. xe vm-disk-list uuid=<vm uuid> (this is to discover the UUID of the interface of the virtual disk)

7. xe vbd-param-set uuid=<vbd uuid> bootable=true (this sets the disk device as bootable)

clip_image010

The vm should now boot paravirtualized using a Xen aware kernel.

When booting the virtual machine, it should start up in text-mode with the high-speed PV kernel. If the virtual machine fails to boot, the most likely cause is an incorrect grub configuration; run the xe-edit-bootloader (i.e. xe-edit-bootloader –n sles) script at the XenServer host console to edit the grub.conf of the virtual machine until it boots.

Note: If the VM boots and mouse and keyboard control does not work properly, closing and re-opening XenCenter generally resolves this issue. If the issue is still not resolved, try other console settings for PV-args, being sure to reboot the vm and close and re-open XenCenter between each setting change.

Installing the XenServer Tools within the virtual machine:

Install the XenServer tools within the guest:

1. Boot the paravirtualized VM (if not already running) into the xen kernel.

2. Select the console tab of the VM

3. Select and right-click the name of the virtual machine and click "Install XenServer Tools"

4. Acknowledge the warning.

5. At the top of the console window you will notice that the "xs-tools.iso" is attached to the DVD drive. And the Linux device id within the vm.

6. Within the console of the virtual machine:

a. mkdir /media/cdrom (Create a mount point for the ISO)

b. mount /dev/xvdd /media/cdrom (mount the DVD device)

c. cd /media/cdrom/Linux (change to the dvd root / Linux folder)

d. bash install.sh (run the installation script)

e. answer “y” to accept the changes

f. cd ~ (to return to home)

g. umount /dev/xvdd (to cleanly dismount the ISO)

h. In the DVD Drive, set the selection to “<empty>”

i. reboot (to complete the tool installation)

clip_image012

7. Following reboot the general tab of the virtual machine should report the Virtualization state of the virtual machine as “Optimized”

Distribution Notes

Many Linux distributions have differences that affect the process above. In general the process is similar between the distributions.

Removal of VMware Tools was tested following import to XenServer and I do not recommend removal of VMware Tools after the VM has been migrated to XenServer. If it is desired to remove VMware Tools, the vm must be running on a VMware platform when the uninstall command is executed within the VM ( rpm -e VMwareTools ).

Some distributions have a kernel-xenpae in addition to the kernel-xen. If PAE support is desired (or required) in the virtual machine, please substitute kernel-xenpae in place of kernel-xen in the instructions. Please see the distribution notes for full details.

Saturday, June 27, 2009

PV enabling an HVM from VMware on XenServer (CentOS RedHat)

This example works for RedHat and CentOS, the instructions are slightly different for SLES and Debian.
As a condition for paravirtualization to work, a kernel that supports the Xen hypervisor needs to be installed and booted in the virtual machine.
Installing the XenServer Supported Kernel:
1. After importing the vm as HVM, boot the virtual machine and open the console.
2. (optional) update the modules within the vm to the latest revision
a. If the kernel-xen package is installed from an online repository – best practice is to fully update the distribution to avoid problems between package build revisions.
3. Install the Linux Xen kernel.
a. yum install kernel-xen
i. the xen aware kernel is installed and entries are created in grub
4. Build a new initrd without the SCSI drivers and with the xen PV drivers
a. cd /boot
b. mkinitrd --omit-scsi-modules --with=xennet --with=xenblk --preload=xenblk initrd-$(uname -r)xen-no-scsi.img $(uname -r)xen
i. This builds a new initrd for booting with pygrub that does not include SCSI drivers which are known to cause issues with pygrub and Xen virtual disk devices.
clip_image002
5. Modify the grub boot loader menu (the default entries are not pygrub compatible)
Open /boot/grub/menu.lst in the editor of your choice
clip_image004
a. Remove the kernel entry with ‘gz’ in the name
b. Rename the first “module” entry to “kernel”
c. Rename the second “module” entry to “initrd”
i. SuSE and Debian require that entries that point to root device locations described by a direct path such as: “/dev/hd*” or “/dev/sd*” be modified to point to /dev/xvd*
d. Correct the *.img pointer to the new initrd*.img created in step 4
e. (optional) Modify the title of this entry
f. Edit the line “default=” to point to the modified xen kernel entry
i. The entries begin counting at 0 – the first entry in the list is 0, the second entry is 1 and so on
ii. In our example the desired default entry “0”
g. (optional) Comment the “hiddenmenu” line if it is there (this will allow a kernel choice during boot if needed for recovery)
h. Save your changes
clip_image006
6. Shut down the guest but do not reboot.
a. Shutdown now -h
Edit the VM record of the CentOS VM to convert it to PV boot mode
In this example the VM is named “centos”
7. From the console of the XenServer host execute the following xe commands:
a. xe vm-list name-label=centos params=uuid (retrieve the UUID of the vm)
b. xe vm-param-set uuid=<vm uuid> HVM-boot-policy=”” (clear the HVM boot mode)
c. xe vm-param-set uuid=<vm uuid> PV-bootloader=pygrub (set pygrub as the boot loader)
d. xe vm-param-set uuid=<vm uuid> PV-args="console=tty0 xencons=tty" (set the display arguments)
i. Other possible options are: “console=hvc0 xencons=hvc” or “console=tty0” or “console=hvc0”
8. xe vm-disk-list uuid=<vm uuid> (this is to discover the UUID of the interface of the virtual disk)
9. xe vbd-param-set uuid=<vbd uuid> bootable=true (this sets the disk device as bootable)
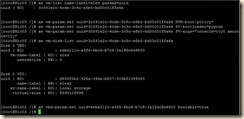
clip_image008
The vm should now boot paravirtualized using a Xen aware kernel.
When booting the virtual machine, it should start up in text-mode with the high-speed PV kernel. If the virtual machine fails to boot, the most likely cause is an incorrect grub configuration; run the xe-edit-bootloader (i.e. xe-edit-bootloader –n centos) script at the XenServer host console to edit the grub.conf of the virtual machine until it boots.
Note: If the VM boots and mouse and keyboard control does not work properly, closing and re-opening XenCenter generally resolves this issue. If the issue is still not resolved, try other console settings for PV-args, being sure to reboot the vm and close and re-open XenCenter between each setting change.
Installing the XenServer Tools within the virtual machine:
Install the XenServer tools within the guest:
1. Boot the paravirtualized VM (if not already running) into the xen kernel.
2. Select the console tab of the VM
3. Select and right-click the name of the virtual machine and click "Install XenServer Tools"
4. Acknowledge the warning.
5. At the top of the console window you will notice that the "xs-tools.iso" is attached to the DVD drive. And the Linux device id within the vm.
6. Within the console of the virtual machine:
a. mkdir /media/cdrom (Create a mount point for the ISO)
b. mount /dev/xvdd /media/cdrom (mount the DVD device)
c. cd /media/cdrom/Linux (change to the dvd root / Linux folder)
d. bash install.sh (run the installation script)
e. answer “y” to accept the changes
f. cd ~ (to return to home)
g. umount /dev/xvdd (to cleanly dismount the ISO)
h. In the DVD Drive, set the selection to “<empty>”
i. reboot (to complete the tool installation)
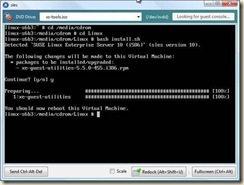
clip_image010
7. Following reboot the general tab of the virtual machine should report the Virtualization state of the virtual machine as “Optimized”

Wednesday, June 17, 2009

XenConvert 2.0.1 is released with VMware OVF compatibility

We have been working on adding Citrix Project Kensho OVF capabilities to XenConvert.

XenConvert is the free Citrix machine conversion utility.  It is primarily focused on converting workloads to either Provisioning Server or to XenServer, however there are some more generic functions that are of interest to most any virtualization folk.

The download can be found here:

http://www.citrix.com/English/ss/downloads/details.asp?downloadId=1855017&productId=683148

If this moves in the future go here: http://www.citrix.com/English/ss/downloads/results.asp?productID=683148 and look for XenConvert in the XenServer download section.

OVF packages from any existing VMware product (known to this date) can be consumed (imported) direct to XenServer.

The physical to OVF path can be run within a Windows machine and convert it to an OVF (meta file + .vhd) or just a vhd.

The OVF can then be consumed to XenServer with XenConvert 2 or to XenServer and / or Hyper-V in the upcoming Kensho refresh.

The VHD can, of course, be copied to any engine that uses vhd.

It also does a binary conversion of vmdk to vhd and injects a critical boot device driver that is compatible with XenServer (and works with Hyper-V).

Also, the XenServer .xva (vm backup files) can be converted to OVF.

Download and enjoy!

Thursday, June 11, 2009

Virtual Machine storage considerations

Storage.

Storage is your issue.

Storage is all about design and deployment.

Passthrough disks were first used for SQL servers, file servers, and Exchange servers.  Workloads that all require large storage volumes with high Disk IO.

Using passthrough dedicates a physical storage resource to a VM.  Before that you carve up the physical resource.

The negative is that you lose flexability in HA, failover, etc.  Not that it cannot be done with proper planning, but it isn't just plug, click and go.  It does take planning, equipment, and design.
I know that lots of folks are producing incredibly large VHDs and using them as storage for VMs.  What does this give you?  A VHD to restore, and backup at the host level.

Otherwise all backup that you do is at the machine level with a traditional backup agent within the VM to back up the volume.
In my mind, it is all about how you design it and want to recover it.

After working through a Disaster Recovery exercise for a particular application, I frequently found myself re-architecting the deployment so I could not only get good running performance, but a fast and easy to execute recovery of the system.

Our most limiting factor was frequently the time to recover the system from the backups (disk or tape).

Again, it is all about design.

The most humbling DR exercise to do is to recover the backup system itself.  A DR exercise that is frequently over-looked. But that is a different story.

As far as tweaking - no, don't tweak storage, design smart.
Split the spindles, spread the load.  Is putting two disk intensive servers on the same RAID 5 array better or worse?  Could that big array be split in two so one VM does not limit the other?

This is the big thing with storage and VMs.

One consideration is volume (gigabytes / terabytes).
The second consideration is performance.  Unlike RAM and Processor - the hardware IO bus is not carved into virtual channels.  It frequently becomes THE limiting resource.  Especially when you have multiple disk intensive VMs fighting  for that same primary resource.  In this case it is not a pool, it is a host resource.  It is finite.  It takes planning. 

VM A will limit VM B (and vice versa) when they fight for the same read / write heads on the same disk array.

This is where you must think about the VMs that you place, where you put their OS VHD, where you put their data.  How you do that storage, how you present storage, etc.

This is where the SAN argument really wins.  As the throughput, carving of storage, sheer number of spindles and heads, really shines.
If you are resource limited and can't afford the SAN, then think about the workloads that you are placing and how you divide the physical resources.  Give each disk intensive VM enough to do its job, but isolate them from each other.

Another strategy is multiple hosts.  Each host has one disk intensive VM.  All other VMs are low disk.  This way they have less IO effect upon each other.

Be creative.

Tuesday, June 9, 2009

The hypervisor processor is not being utilized

Recently, I have answered this question in the forums quite a bit.

The basic situation is:  the processor within a virtual machine is running at 100%, but the host processors at sitting there, twiddling their thumbs and only using 5% (for example).

The next response that I usually see is:  How can I tweak this all about to make that more the way I see things happening when not running in a VM.

First of all, stop there.  Type I hypervisors (XenServer, ESX, Hyper-V, VirtualBox, etc.) all have to manage the pool of physical resources.  It is all about isolating, containerizing, containing, and sharing the physical resources.

If a guest goes 100% on a processor the host should not go 100% on a processor.

The Type I is a full hypervisor, therefore all physical processors have been virtualized and the hypervisor migrates processes between the processors to balance out the load.

This is to maintain the integrity of the entire virtual environment and to prevent a single VM from hogging the entire system.
What you see with Hyper-V you should see with ESX, or XenServer, or Virtual Iron, etc.

You will se different results with VirtualPC, Virtual Server, VMware Server - because they are not full hypervisors - they are hosted virtualization solutions and share in the physical resources in a different way.

Here is a scenario:  What if the VM processor utilization was dynamic, it is allowed to take more from the host as it needs it.

If the amount of processing power given to a VM was dynamic.  In that if the VM spikes, then a host processor spikes.
As soon as you have more than one VM, all the other VMs now lose.

And, if a second VM does this same thing, now the remaining VM lose even more.

In the mean time, the poorly written application that is causing the processor spiking in the first place is taking resources from all the other users that are sharing in the pool of physical resources, for no good reason.  He is just being a hog.

Also, that operating system that you login to at the console, think of that as a VM as well.  He also has to share in the pool of physical resources.  So, if a single VM is allowed to spike a physical processor, then the Host itself also loses and it not able to respond to all the other VMs that run on the host including the hog VM.

For there it is just a downward spiral into the depths of an impending crash of the entire host and all of the VMs.
this is the hypervisor model.  All machines running on the hypervisor must share (play nice) with each other, or everyone loses.

So each machine is placed into a container, and that container is bounded.

These bounds can be modified on a VM by VM basis.  And if you have a single host only running a couple VMs, then playing with these settings generally does no harm.  As soon as you scale and add more and more VMs, this tweaking gets out of hand very quickly.

You tweak VM A in a positive way, which in turn has a negative impact on VM B and C.  So you compensate and tweak VM B and C which in turn has an impact on VM A again.  And you end up tweaking the environment to death.

The recommendation from all hypervisor vendors is to not mess with the default settings unless absolutely necessary.  And if you do, document it very well.

Now, if you have a single VM that is miss-behaving, then you need to dive into that particular VM (just like a physical server) to determine why he is processor spiking.  Is it an application?  Is it threading?  Is it device drivers?  Was the VM converted from another platform or physical installation?

There are tons of factors.   But always begin by looking at the application or process that is taking the processor and expanding from there.

Friday, May 22, 2009

The OVF and OVA dilemma

Here is a really good definition that I can thank my manager for of “OVF”:

OVF is a vendor- and platform-independent format to describe virtual machine metadata and create portable virtual-machine packages. These packages do not rely on a specific host platform, virtualization platform, or guest operating system. However, the virtual disk referenced by the OVF package must be compatible with the target hypervisor.

The Open Virtualization Format is a new and developing standard from the DMTF (Distributed Management Task Force). Its purpose is to form a common framework that any virtualization vendor can use to define a virtual workload. This workload can be simply a single virtual machine; this workload could also contain many virtual machines and also include complex descriptions for networking, applications, EULAs, and other entities. In theory, a single OVF could define all of the workloads within an entire enterprise and those workloads could be transported to a remote site for DR, or moved to a new datacenter. The possibilities are many.

The standard is here: http://www.dmtf.org/initiatives/vman_initiative/OVF_Tech_Note_Digital.pdf

The concept seems simple enough.

When talking to IT Professionals there is always time spent describing OVF and OVA, and where each fits.

“OVF” is the acronym for the standard.

What is referred to as an “OVF Package” is the collection of the workload states, plus a description meta file, plus any other entities that are defined in the description file.

BTW – the description file is also called the OVF file, or OVF meta file or OVF descriptor. This is why this gets really confusing really fast.

Here are the two important terms that get thrown around:

OVF / OVA – these are not the same thing.

An OVF is a collection of items in a single folder. Most commonly this is a description file (*.ovf) a manifest file (*.mf), and virtual machine state files (*.vhd or *.vmdk)

An OVA is a single file. The OVA is the OVF folder contents all zipped into a single file. The purpose of the OVA is when you want to take an OVF and share it, or give it as a download. The OVA needs to be opened into the OVF before it can be consumed.

Currently there are a host of folks working on OVF, you can learn more about the companies involved at the web site: http://www.dmtf.org/initiatives/vman_initiative/

Most commonly folks are running into OVF with Citrix (Project Kensho and XenConvert 2); VMware (VMware Workstation 6.5, Virtual Center 3 update 3, OvfTool, etc.); Sun (Virtual Box 2.2); and IBM. The big problem to date has been that the standards have been evolving during the time that these tools have been available. For example: a VMware v3 produced OVF is distinctly different than a VMware v4 OVF package. Mainly due to the state of the standards at the time the software was written. So, currently there is little cross platform between vendors.

The other problem that is happening right now is that defining a workload in an OVF is great, however, since these are virtual machine based – the operating system within the virtual machine has to deal with the fact that the virtualization hardware underneath it has been modified. Having a virtual machine as an OVF is not the same as having a virtual machine and running it through a conversion engine that repairs the operating system within the vm.

This is all evolving and will come in time.

Thursday, May 21, 2009

The layers to Linux on Hyper-V

Recently I have been seeing and getting many questions regarding the Linux Integration Components for Hyper-V virtual machines.

Through a bit of questioning, I have discovered a couple things, and distinct levels to running Linux VMs on Hyper-V.

Note: Since SuSE 10 SP2 is the ‘supported’ distribution, any instructions will be specific to it.

I am assuming that you have obtained the SuSE media and performed a ‘vanilla’ installation into a new Hyper-V virtual machine.

WARNING: Level One can lead to Level Two. And, always perform a backup / export / snapshot before proceeding. All usual disclaimers apply.

Level One – the beginning

This is a simple installation of just the Linux operating system within a Hyper-V virtual machine. The only caveat is that the VM needs a Legacy Network adapter for network connectivity.

In this case you will end up with a working Linux VM. It should auto detect an install an SMB (multi-processor) kernel and it should just work. The performance is not the best that it could be, but it should run.

Level Two – the path to enlightenment

This is the simple installation from above, with the addition of the Hyper-V Linux drivers.

This one is a bit more involved. However, the end result is that you are running the synthetic Network Adapter, and the optimized storage, and display (and other) drivers.

This optimizes drivers, but advanced integration features such as shutdown from the host (or SCVMM) is currently not available.

To obtain driver enlightenment:

a) Obtain the LinuxIC.iso

http://www.microsoft.com/downloads/details.aspx?displaylang=en&FamilyID=ab7f4983-93c5-4a70-8c79-0642f0d59ec2#tm

b) obtain the inputvsc.iso for the mouse driver

http://www.xen.org/download/satori.html

c) add the kernel-source and gcc-c++ packages

YaST can be used for this, either GUI or command line

Note: if an ISO was previously attached, you may need to detach, pause, then attach the desired ISO for SuSE auto-mount to pick up the change.

If that does not work, make a mount point ( mkdir /media/CDROM ) and mount /dev/hdc /media/CDROM

d) Install the linuxic drivers

a. Open a Terminal

b. attach the downloaded LinuxIC.iso through the Hyper-V manager

c. Create a folder and copy the contents to the folder

d. mkdir /tmp/linuxic

e. cp –rp /media/CDROM/* /tmp/linuxic

f. cd /tmp/linuxic

g. ./setup.pl drivers

e) Install the mouse driver

a. Attach the inputvsc.iso through the Hyper-V manager

b. Create a folder and copy the contents.

c. mkdir /tmp/inputvsc

d. cp –rp /media/CDROM/* /tmp/inputvsc

Note: you may need to mount again: mount /dev/hdc /media/CDROM

e. cd /tmp/inputvsc

f. ./setup.pl

f) Power down the VM, remove the Legacy Network Adapter, add a Synthetic Network adapter, power on the VM (you could also do a shutdown now –hP)

g) Using YaST (or YaST2), configure the newly installed synthetic network adapter.

Thursday, April 30, 2009

Hyper-V snapshots are taking up a large amount of disk space

This has been a popular topic in the forums recently.
The scenario:  a VM is on a volume, everything is happy.
As time passes, a few snapshots are taken (for various reasons) and suddenly the disk utilization is through the roof.
What is going on?
A few things might be going on, there are a bunch of variables in the equation.
Variable 1:
How much change happened after the snapshot was taken?
Differencing disks are an overlay map, therefore you could totally re-install the VM after a snapshot and thus your VHD would be limited to the same size (the size limit of the VHD).  However, on your storage volume it would now take up twice as much space.
Variable 2:
Was the VM running when you took the snapshot?
Here is a big one.  If the VM was running the VM can be restored to that previously running state.  Thus all that occupied memory space must be saved as well.   Now, not only is the disk (potentially) using more storage, but the SQL instance in the VM was set to use 2Gb of RAM, and all of that memory space must be saved as well.
Variable 3:
What is the location of the snapshot files?
Was the default %systemroot% location changed so the snapshots reside with the VM?
The actual snapshot files can be held on any locally presented storage, they don’t have to reside with the VHD.
there are more variables, but these are the big ones that have quick and hard impact that are easy to affect.
Just some forward thinking is required.

Here is my addition from a recent forum post:
.bin files are memory snapshots - these can be as large as the configured RAM of your VM.


.avhd are the differencing disks that make up a differencing disk chain, which is the way that snapshots are implemented under the hood.

the Default behavior with R2 is that all VM files (except the configuration) are held in the same directory, where the VM virtual disks are stored (the root folder of the VM). This makes VM migration much easier and fool-proof.

The hitch with using differencing disks is that a child differencing disk can be as large as its parent. Don't think dynamic disks either. A dynamic disk has a maximum size and it is that maximum size that you must be thinking of.

This being said if you create a new VM and take the default of a 127 Gb Dynamic disk. you have the potential of consuming 127 Gb of storage. If you create a snapshot you sitll have the potential of consuming 127 Gb or storage - PLUS the storage that you already consumed withthe VHD. If you create snapshot #2 you have the potential of consuming 127 Gb of storage plus the amount of storage you consumed with the VHD and the AVHD from snapshot one. And this continues.

If you take snapshots of running VMs, then you also have the storage required to hold the memory of the running VM. Therefore, yet more storage.

Wednesday, April 29, 2009

MSFT finally talks snapshots in detail

Finally, after a long time of answering forums posts and my own posts here.

Ben Armstrong (or VirtualPC Guy fame) has posted a series of articles regarding snapshots and snapshot behavior.

Please, read and enjoy.  These are not going away any time soon.

Where are my snapshot files?

http://blogs.msdn.com/virtual_pc_guy/archive/2009/04/13/where-are-my-snapshot-files-hyper-v.aspx

What happens when I delete a snapshot?

http://blogs.msdn.com/virtual_pc_guy/archive/2009/04/15/what-happens-when-i-delete-a-snapshot-hyper-v.aspx

What happens when a snapshot is being merged?

http://blogs.msdn.com/virtual_pc_guy/archive/2009/04/16/what-happens-when-a-snapshot-is-being-merged-hyper-v.aspx

Why does it take so long to delete a virtual machine with snapshots?

http://blogs.msdn.com/virtual_pc_guy/archive/2009/04/20/why-does-it-take-so-long-to-delete-a-virtual-machine-with-snapshots-hyper-v.aspx

What happens if I start a virtual machine that is merging snapshot files?

http://blogs.msdn.com/virtual_pc_guy/archive/2009/04/21/what-happens-if-i-start-a-virtual-machine-that-is-merging-snapshot-files-hyper-v.aspx

Should virtual machine snapshots be used in production?

http://blogs.msdn.com/virtual_pc_guy/archive/2009/04/23/should-virtual-machine-snapshots-be-used-in-production-hyper-v.aspx

Friday, April 24, 2009

To Glom or not to Glom is a taskbar option

This has to be one of the most interestingly named Registry keys that I have come across yet.

"TaskbarGlomming"=dword:00000001

What is this?

Interestingly enough, this the key that sits behind the “Group similar taskbar buttons” settings of the taskbar.

The reason that I bring this up, is that it is an interesting statement on USA slang expressions.

Most of use are used to using the term ‘glom’ or ‘to glom’ to describe the act of ‘hanging on to’. 

Like that girlfriend you had in High School that just would not give any personal space and demanded to be hanging off of you at all times possible.

Interestingly enough, no one has entered this word into Wikipedia yet.

thefreedictionary.com has an interesting definition that fits well though:

glom - seize upon or latch onto something

Obviously when you set the Registry key “TaskbarGlomming” to true you cause all of the like programs to glom upon each other.

Just caught me as humorous today.

Thursday, April 16, 2009

Migrating Debian from VMWare ESX to XenServer

Fixing Debian virtual machines after migration
After import:  Debian boots, detects new hardware, and installs new device drivers.
The boot sequence fails at the following error: ALERT! /dev/sda1 does not exist. Dropping to a shell!
clip_image002
This is because the source host (ESX server) presents boot devices as SCSI bus devices by default and the paths have been set within the installation of Debian.
To fix the Debian boot loader:
The Grub boot loader has dropped you into the BusyBox recovery shell. At a command prompt under initramfs.
Begin by looking at the Storage tab in XenCenter and note the presentation (device path) of the virtual disk. This describes the bus that is used to present the virtual disk to the virtual machine. This information does not appear for all virtual machines, but in this case it is available so I will use it to save time attempting to discover the interface and volumes.
clip_image004
This shows that the virtual disk is on /dev/hda – this represents the first IDE interface.
I will begin by returning to the virtual machine console and listing the IDE devices.
clip_image005
Five IDE devices have been identified.
· /hda represents the disk in position 0 IDE controller 0
· /hda1 represents the first partition of the disk /hda
I am going to make an assumption that my Debian installation is on the first partition of the IDE interface. Please note that some Linux installations place the swap on first volume, so some repetition of the follow steps might be necessary to discover the proper volume.
At the command prompt I am going to mount the partition as /root.
This is safe in this case because /root was not loaded as noted by the Alert! message identifying the missing boot device.
clip_image007
Now that the file system is mounted under /root I will verify that it appears to be my Linux installation
clip_image009
Listing the contents I see \boot, \root, \etc, \bin, and so forth. All of these are directories that I expect to find at the root of a Linux installation.
I will first fix the device descriptor file /etc/fstab.
· Change to the /root/etc directory
· Open fstab in an editor
clip_image011
Note the entries that point to /dev/sda; these are the entries that we will be changing to /dev/hda since a SCSI disk controller is no longer available.
Modify the /sda entries and save the file.
clip_image013
Similar steps need to be repeated for the Grub boot loader and the device map.
Change to the /grub folder.
clip_image015
Open the menu.lst file in an editor.
*Note: This file name is menu.Lst not menu.1st
Near the end of the file are the entries that we are concerned with.
Find the boot menu options that point to the /sda device.
clip_image017
Change the entries to /hda. Then save the file.
clip_image019
The virtual machine is now ready for reboot.
Simply enter ‘reboot’ at the command prompt.
During reboot, you may notice that the boot hangs after detecting the USB Tablet device. Select <Enter> to accept the default identified mouse device.
Previously under VMware, my Debian virtual machine was running X server for a graphical desktop.
As with RedHat an error that X server failed to start. After selecting No to bypass the detailed troubleshooting screens a dialog is presented that the X server has been disabled.
clip_image024
After selecting OK you are presented with a logon prompt.
To repair the X server:
To reconfigure the X server two methods can be used:
1) Edit the file /etc/X11/xorg.conf directly
2) Allow automated reconfiguration and accept the identified devices.
To run the automated reconfiguration:
Login as root and then execute reconfiguration for the xserver package.
clip_image026
Step through the wizard and accept the automatically detected defaults.
When the wizard completes start xserver by entering startx or reboot the virtual machine.

Migrating SLES from VMWare ESX to XenServer

For SuSE Linux Enterprise Server I require a “Helper” virtual machine to mount and repair the file system. This is because SLES recovery console does not include an editor.

After migrating SuSE and booting the boot loader fails at: “waiting for device /dev/sda2.” This is as expected because /sda refers to a SCSI bus and on XenServer SuSE actually sees an /hda (IDE) boot device.

clip_image002

The Helper VM can be created using the XenServer provided Debian Etch template virtual machine (this template includes the media, making it practically ready to go). The included Debian distribution also works with the SUSE reiserFS that is installed by default.

It is also of note that SuSE has a full Xen aware kernel and can be further optimized by presentation of the boot devices as Xen Virtual Disks and by loading a paravirtualized kernel. These optimizations are outside of this article; this is specifically focused on having a running virtual machine.

Import the VM to XenServer:

In my examples I am using XenConvert 2.0 to consume the VMware OVF virtual appliances, however Citrix Project Kensho can also be used.

Creating the Helper virtual machine:

In XenCenter select VM -> New

Choose ‘Debian Etch 4.0’ as the template (this template provides the installation template plus the operating system, nothing to download).

Name the virtual machine “HelperVM” and complete the New VM wizard accepting the defaults, allow the VM to boot, and open the console of this VM.

At the console of HelperVM enter a new root password, VNC password, and a host name (‘HelperVM’ is my suggestion).

Mount the SLES virtual disk to HelperVM:

In XenCenter select the SuSE virtual machine, and then select the Storage tab.

Select the virtual disk (make a note of the disk name) and then click Detach.

clip_image004

*Note: the VM must be powered off to detach a virtual disk.

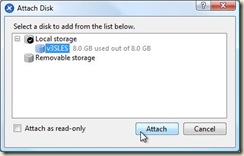
Select HelperVM, then the Storage tab, and then click Attach.

clip_image006

Select the SuSE virtual disk from the Storage Repository and click Attach.

clip_image007

Return to the HelperVM console.

Note that HelperVM should have auto-mounted the volume (in this example HelperVM was running when I attached the virtual disk). My example added the controller device xvdc with the partitions of xvdc1 and xvdc2.

clip_image008

This can also be seen in the Storage tab of XenCenter.

clip_image010

Return to the console of HelperVM and create a path to mount the volume and mount the first volume.

Mkdir /mnt/suse

mount /xvdc/xvdc1 /mnt/suse

clip_image011

Note the error that this looks like swap. I will try to mount the other volume.

clip_image012

Switch to the mounted file system and list to verify that this appears to be the root volume.

clip_image013

Repairing the boot loader:

From this point forward the process is fundamentally no different than repairing Debian or modifying the Grub menu and fstab of any Linux distribution.

I will begin by repairing fstab.

From the root of the mounted SuSE virtual hard disk (/mnt/suse) change to the /etc directory and open the fstab file in an editor.

It should look similar to my nano editor screen below:

clip_image014

I am going to modify the two entries that point specifically to a SCSI presented boot device to IDE.

Previously, in the XenCenter Storage tab for the SuSE virtual machine I observed that the virtual disk was presented on an IDE controller.

The new fstab should resemble this:

clip_image015

Now, to proceed to the Grub boot loader menu.

One way to approach this is to copy an existing entry to a new entry and make the necessary modifications to the new entry. In this example I am modifying the existing entries for the new hypervisor.

Change to the /boot/grub directory ( cd /mnt/suse/boot/grub )

And open menu.lst in an editor.

clip_image016

Find the entries that refer to /dev/sdaX and change them to /dev/hdaX. In the screen shot above this is /dev/sda2

clip_image017

Then save the modifications.

To safely continue I need to un-mount the SuSE virtual disk from the HelperVM.

Return to the root of the file system ( cd / ) and use the umount command to un-mount the xvdc2 device.

clip_image018

To continue to repair the SuSE virtual machine, the virtual disk needs to be detached from the HelperVM and attached back to the SuSE virtual machine.

Mount the SLES virtual disk to the SuSE VM:

Begin by shutting down HelperVM.

clip_image019

Select the Storage tab of HelperVM. Select the SuSE virtual disk and select Detach.

clip_image021

Select the SuSE virtual machine, select the Storage tab, click Attach

clip_image023

Select the correct virtual disk and Attach.

clip_image024

Open the console of the SuSE virtual machine and power it on.

Additional repairs:

As with other Linux distributions, if X server was used to present a graphical console it will require repair due to the capabilities of new video devices.

clip_image025

X server is then disabled.

clip_image026

To repair X server, logon as root and repair the X server by running SaX2

At the command prompt execute the command sax2 -f

At the completion of the wizard X server can be started by executing startx or rebooting.

The one thing that you will notice is that there is no mouse support. Setting up VNC Server within the virtual machine and connecting to a graphical console using this VNC connection can resolve this situation.